Archive
Stir-Fry
Over the holiday’s my hard-drive crashed.
If this has ever happened to you, my condolences. Clearly you felt my pain. If you haven’t, then let me tell you it sucks. Its a significant gut-wrenching, heart-stopping moment.
After the initial punch-in-the-face you step back and realize you’re just an average user and you didn’t lose your 500 page “masterpiece” that was in the final stages of refinement before shipping to your publisher. It’s not that bad.
You probably lost some music which isn’t a true loss because you probably have it all on iTunes.
Maybe it was some some pictures of your cute puppy, which, lets be honest, have probably already been overly shared on Facebook or Instagram. Again, easy to get back.
Even important stuff like taxes are most likely stored through your online tax service or if you’re “old school”, you have printed versions.
Yes I can get my music back, same with some recent pictures of the dogs and my tax information. What I can’t get back are pictures that I wasn’t ready to share. Namely a few hundred unedited senior pictures I took of my step-son. It’s not the end of the world but for a parent of a kid that isn’t the most photogenic to begin with, that’s a huge loss. Things happen so we’ll try again in the spring.
There is a lesson to be learned here and that is back up files and back them up often. Ironically I do have a back-up hard drive but its only as good as the frequency in which you take advantage of it. For me it was about every 6-8 weeks or so…which clearly isn’t enough. I also learned that “Google Drive” is now my new best friend.
By the way, I also lost a bunch of photos I had ready for the blog, which is partly to blame for my hiatus. Also, the batteries in my “grown-up” camera are dead hence the use of my smartphone picture for today’s post. I clearly need to step up my game.
While I throw myself a pity-party, here’s a healthy, immensely flavorful stir-fry dish for you to try. I made this version with pork but you could substitute chicken or shrimp. Enjoy!
Ingredients:
|
Serve with rice or noodles — eggroll optional.
Chinese Pork with Rice and Broccoli
I started a new job recently. I’m still with my same company but was looking for a fresh start outside of the day to day Project Management role that I’ve been playing more than half of my career. The new role keeps me involved in projects (which I like) but allows me the opportunity to expand the role beyond project plans and issue logs.
Yesterday I wrapped up my first week and I can tell that no day will be exactly the same –something that I think I’ll really enjoy about it.
I bring this up because with a new job comes change. For the past several years I’ve been fortunate enough to work for a very good boss that allowed me great flexibility. The new job, while I believe affords me a lot of that same flexibility, it’s not 100% the same.
That being said, right now, I’m not sure I’ll have time to put together a lot of the weeknight meals I’ve grown accustomed to. Not that I’ve been putting together 5-course meals, but most of the stuff I made did require a little pre-planning. So because of that, I’m on the hunt of quick and easy weeknight meals.
Now when I think quick and easy, homemade Chinese doesn’t come to the forefront. However, this recipe is extremely simple. Not only is it easy, its inexpensive as the whole dinner costs less than $10 and there will be some leftover for lunch the next day.
The main part of this dish is pork blade steaks (they look like this). If you can’t find blade steaks, you can use any pork (or even chicken or beef). The pork is added to the crock pot with a couple other ingredients. Is there anything more simple than a crock pot meal?
When you get home, all you have to do is cook the rice and broccoli. Together with the pork you have you very own Chinese Take-Out right in the comfort of your own home. Enjoy.
Ingredients:
|
Beer Braised Pork Ribs
Before I get today’s story and recipe, I thought I’d share that today’s entry marks my 50th.
I assume somewhere in the blog-o-sphere, this is considered a major accomplishment. But honestly, since I don’t own the blogging handbook, I really have no idea. Regardless if 50 is considered an accomplishment, I’m going to give myself a pat on the back because I think it’s pretty special. Maybe I should have made a cake?
As I stated on the first day I got this up and running, I mainly do this for myself. But I have to admit, it’s pretty cool when a total stranger, half-way around the world follows me regularly. Knowing this person took time to sign up to find out what I have to share is something I really didn’t expect.
So all you regulars, THANK YOU! I hope you continue to enjoy what I have to say, and obviously, what I’m cooking. Hopefully I’ve even inspired a few of you try something you really didn’t think you could do.
If this is your first time stopping by, thank you as well. Maybe you’ll like what you see enough to want to come back.
********************************************************************
Today’s recipe is Beer Braised Pork Ribs. In my best attempt to mimic Homer J. Simpson….”Mmmmmmmm Beeeeer.”
I recently attended one of Pittsburgh’s premier events, The Big Pour. This event, now in its 6th year, is held annually to benefit Pittsburgh’s only (I believe) non-profit building material reuse retailer, Construction Junction.
The Big Pour allows anyone who is lucky enough to get a ticket (the event sells out in minutes) an opportunity to sample several types of beers from over 40 different craft breweries, as well as local food from area restaurants. There really are no restrictions on how much you enjoy (that is until the keg runs dry).
The Big Pour is truly a beer lover/foodie paradise and my belly left happy. More importantly, it left me with a nice feeling knowing that I’m helping out a good cause.
So what is Construction Junction?
Let’s say you’re remodeling your bathroom. Instead of taking that old sink to the curb where it will eventually take up space in the landfill, drop it off at Construction Junction (or arrange for a pick-up). As as long as it is still in working condition, they’ll take it off your hands. Not only can you drop off, but you can browse and buy. For example, if you’re looking for an old door (or anything really) to re-purpose, stop by CJ and they might have something you need.
So next time you have something to get rid of, think twice before letting the garbage men take it.
Ah…..feels good to give back.
Ok, enough of that….here’s the Beer Braised Ribs recipe which I found in the Food Network Magazine. I don’t deviate from the ingredients all that much (just a slight tweak in the amounts).
This recipe is one of my all-time favorites. I enjoy the “gravy” it makes and a nice roll or hunk of bread comes in handy for sopping up the juice. The recipe is perfect for those cold fall and winter nights. Enjoy!
Ingredients:
|
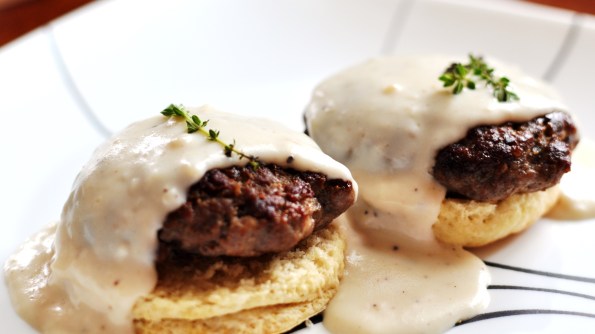
Sausage Gravy and Biscuits
Bacon is everywhere. Bacon candy, bacon cupcakes, bacon beer…the list goes on. But what about the other porky breakfast meat? When does sausage start showing up with regularity on Pinterest?
I’m here to help out by blogging about my favorite way to prepare sausage. Sausage gravy and biscuits.
I must state, if you’re looking for something low in calories, I suggest you stop reading now. This ain’t it. This my friends is full fat on fat, topped pretty much with more fat.
But where there is fat there is flavor. These have lots of flavor.
Luckily these are filling so one portion should do it.
With just a few simple ingredients, it’s a cinch to put together also.
This presentation is nice when having friends over for breakfast/brunch, but feel free to crumble the cooked sausage and toss it right in with the gravy. No rules here.
For best flavors, make the sausage mix the night before and cook the following morning. Enjoy!
Ingredients:
|
Cuban Sandwich with Chipotle Butter
Anyone with a food blog must love cooking, why else would we take the time to write about it. However, there are times where I’m too busy (read lazy) to do anything elaborate. Those days require a good old-fashioned sandwich.
Lucky for me, I happen to love sandwiches.
While I have many favorites, I’m particularly fond of pastrami on rye, classic grilled cheese, and my all-time favorite Italian subs.
Slowly moving up my list of favorites is the Cuban.
On the surface, the Cuban, traditionally made with pork, ham, and Swiss cheese seems like a fairly basic sandwich. But when you put it all together with the pickles and mustard, it’s quite amazing. But what really separates the Cuban from just another grilled sandwich is the crunchy texture it takes on by literally smashing it when grilling.
Personally, I don’t think a sandwich press can get it right (plus I don’t have one). Therefore I use a couple of heavy bricks wrapped in foil. It’s a great technique that can also be used when grilling a whole chicken (but that’s another day).
Here’s my version of the Cuban sandwich that adds just a touch of heat in the form of chipotle pepper butter. If you don’t want the heat, feel free to use plain butter.
Ingredients: (no quantities of meat etc. listed – use as much or as little as you like)
- 2 Tablespoons butter, softened
- 1 chipotle pepper in adobo sauce, minced (seeds removed – optional)
- 1 loaf of cuban bread (I used French but you can use any similar crusty exterior bread)
- Roasted Pork (I use leftover from any time I make a pork roast)
- Virginia Ham
- Swiss Cheese
- Pickles
- Mustard
To make the chipotle butter, mix 1 chipotle pepper with the softened butter. Set aside.
Cut bread lengthwise and apply a generous amount of mustard to one side of bread. Add ham, pork, pickles, and cheese. Top with other half of bread.
Slater the top of the sandwich with half of the chipotle butter.
Lay sandwich on grill or griddle (or large pan) butter side down. Gently lay brick on top of sandwich and smash the sandwich to balance the brick.
Grill a few minutes until cheese begins to melt.
Remove brick (careful, brick may be hot) and flip. Slather with remaining butter and flip.
Once again, balance brick and grill a few more minutes until heated through.
Remove from grill and enjoy!
Pork Tacos
I’ve lived in Pittsburgh for 35 years and for as long as I can remember, weather in this town has always been a major topic. Perhaps it is because the city is made up of so many different types of personalities, that weather becomes the one thing everyone relates to. I get it, but must we obsess? Must our newscasts devote more than just a minute or two discussing what anyone who has looked or been outside already knows? Must everyone (and their mother) post a picture of the temperature on Facebook? January and February it gets very cold and it snows. In the summer months its hot and humid. That’s fact in Pittsburgh – no need to dwell and complain.
Since it is late June and usually that means its hot, sometimes more hot than normal temps (notice I’m stating fact, not complaining), the last thing I want to do is cook. But alas, I have a family to feed and a blog to write (although the latter is obviously optional).
When the dew point is high and temperatures begin to creep up, grilling becomes my best cooking option. However, I understand some of my readers may be intimidated by the grill (i.e. bored of the grilled goodness category), so I’m going with a crock pot recipe (which is the next best cooking option when its hot). If you want to grill, check out my grilled pork tenderloin recipe and serve it up on a tortilla using any toppings you wish.
Whether you fire up the grill or use the crock pot recipe below, you’ll find both recipes are a cinch to make. They’ll easily feed a family of 4 (with leftovers) and most importantly neither one will heat up your kitchen on those hot summer days. I recommend mixing up a delicious frozen Margarita to beat this EXTREME HEAT. Now if you will excuse me, I need to wipe the sweat from my brow.
Ingredients:
- 1 large or 2 small pork tenderloins (about 1.5 lbs)
- 2 cups of chicken stock (or 1 cup stock, 1 cup water)
- 1 package of taco seasoning
- 1 can of pinto or black beans, drained and rinsed (14 ounce)
- 1 can of diced tomatoes (14 ounce)
- 1 can of green chilies, diced (4 ounce)
- 1 package of frozen corn
- 16 corn tortillas
- Garnish: Cilantro and Cotija, Queso, or cheddar cheese
Mix together the broth and taco seasoning.
Next, add all ingredients except corn and tortillas to the crock pot cover and cook on low for 8 hours.
Once the pork is cooked, shred it and add back to the pot. Add frozen corn, stir. Let cook another 30 minutes.
When ready, warm tortillas using a skillet heated with olive oil (30 seconds per side). Place in a warmer (or between a few sheets of paper towels) until ready to use.
Using TWO corn tortillas for each taco (or 1 flour tortilla) add a few heaping spoonfuls of the cooked pork mix using a slotted spoon. Top with cheese and cilantro. Finish with a fresh squeeze of lime juice. ENJOY!
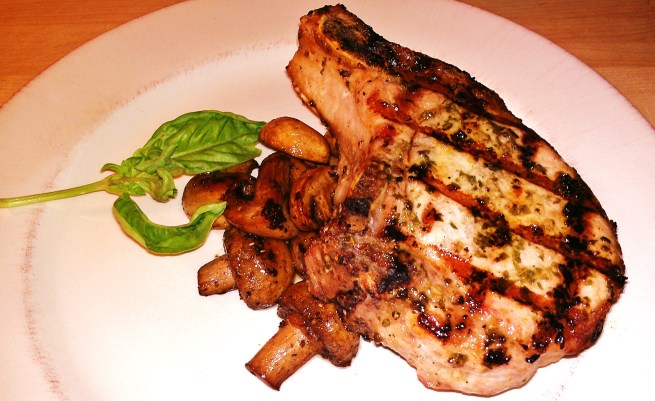
Basil-Garlic Rubbed Grilled Pork Chops
Recently I came across a recipe for grilled pork chops that I couldn’t wait to try. The picture of them looked fantastic and with the simple, fresh ingredients, it sounded like a winning combination.
I made a special trip to the store and dashed to the butcher counter. There I would have the butcher hand pick a few of the best looking, thick, bone-in chops I’d ever buy. I thought he would be annoyed when he would pick one, and I would kindly tell him “sorry, but could I have the one next to it.” Some people don’t do this and settle for pre-packaged shrink wrapped meat, but I say if I’m paying for it, I should get what I want. You should too.
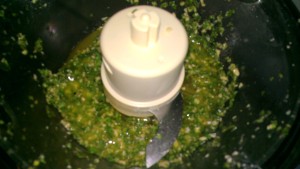
Once home, I assembled the ingredients (minus the pork) and gave them a quick death via the food processor to make a nice green paste. With my silicon pastry brush in hand I was happier than Bob Ross (rest in peace) as I painted my pork chops with the phenomenal smelling mix.
After an hour or so in the fridge, all that was left to do was fire up the grill. I stepped outside, lit the grill and impatiently waited for it to pre-heat. I needed some serious heat to acheive the kind of sear I wanted on these beauties.
With the heat from the grill at nearly 500 degrees, I gently placed the chops atop the grates. The sound of the meat sizzling as it hit the heat was music to my ears.
Then, out of nowhere the wind picked up and the sky turned to black. The heavens were about to unleash grilling hell upon me.
With the chops sizzling away, there was no turning back. I simply had no choice other than to finish what I started.
But it wasn’t about me. I could care less how wet I got. It was about those glorious hand picked chops. Would I be able to achieve the success I was looking for while darting in and out of the rain (for the record, an umbrella would not have helped here)? I needed to cook for a few minutes, rotate, flip, cook, rotate. Each time I would need to lift the lid, exposing the meat to buckets upon buckets of H2O. Could I pull it off? Would these be the pork chops I had hoped they would be when I first saw the recipe or would they land on my plate as mediocre hunks of the other white meat?
With the chops fully cooked (plus 5 minutes of rest and relaxation) it was time to transfer them to the plate for the tasting. Without hesitation I sliced the first bite and stabbed my creation with the steel tines. Fork to meat..fork to mouth. VICTORY!
OK, so after writing this I realized that I really, REALLY, over-dramatized the situation. Yes it rained and yes it sucked and that was my point. I just hate to grill in the rain. But for these chops, which I think were the best chops I’ve ever tasted, I’d do it all over again.
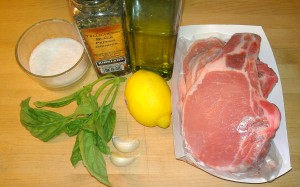
Ingredients:
- 3 or 4 thick cut bone-in pork chips
- 2 garlic cloves
- 1/2 cup fresh basil leaves
- 2 tablespoons of lemon juice
- 2 tablespoons of extra-virgin olive oil
- 1 teaspoon of kosher salt (or course salt)
- 1/2 teaspoon of fresh ground pepper
While the food processor is running, add the garlic to mince. Stop and add the basil and pulse to chop. Stop. Add lemon juice, olive oil, salt, and pepper and process to make a thin wet paste.
Spread mixture on both side of pork and let stand at least 15 minutes (up to 2 hours in the fridge – which is what I did).
Preheat grill to high.
When grill is hot, place the chops on the grates and grill 4 minutes. Rotate the chops one-quarter and grill 2 additional minutes.
Flip then grill for 3 minutes. Rotate one-quarter and grill an additional 2 minutes.
Remove from grill and let rest 5 minutes (if you can).
ENJOY!
Grilled Pork Tenderloin
Some guys like cars. Washing, waxing, buffing and shining their vehicles to keep them in pristine condition (I hate washing the car but I do run it to Mr. Magic a few times a year)
Some guys like their entertainment systems. Booming bass coming from their perfectly harmonized 6 speaker sound system tied in to their 60 inch wall mounted LCD. (I’m fairly certain I don’t need to hear Iron Chef in surround sound — hmmm, then again)
Me? I like grills. I have my Weber Genesis gas grill. 40,000 btu’s of intense heat ready to conveniently cook most anything in 20 minutes or less. My Weber Kettle charcoal grill provides maximum surface space large enough to hold enough meat to feed the hungriest picnic crowd. And the baby portable WeberQ, with just enough space to feed the tailgate crew “breakfast.” Oh yeah!
I cook as often as I can on my grill. Spring, summer, fall, and winter. I cook the basics like burgers and dogs and of course chicken and steak. I’ll also do some things that involve a little more skill such as grilled pizza. There will be many grill recipes as I continue the blog.
Because of its versatility, pork tenderloin sees a lot of grill action at my house. Therefore I’m kicking off the grilling category with it. Also, since my friend Laura recently started a blog, and she shared her go to pork tenderloin recipe (which is great), I figure I’d return the favor and share mine. By the way, you can read Laura’s stories and recipes here.
Ingredients:
Pork Tenderloin (I buy the pack bulk pack from costco – usually 2 smaller tenderloins in each pack. Enough for dinner and leftovers)
Zest of 1 Lime
1/2 cup of lime juice
1/4 cup of honey
1 teaspoon of kosher salt
1/2 teaspoon of garlic powder
1 chiplote pepper (in adobe sauce)
Whisk together the lime zest, lime juice, honey, salt, and garlic powder. Pour half of marinade in a zip top bag. Cover and refrigerate the remaining half.
Add to the zip top bag 1 chipolte pepper. Squish (technical cooking term) the marinade together to ensure all ingredients are well blended.
Place pork in to the bag, seal it, making sure as much air is out of the bag.
Place the bag (in a bowl in case of leaks) in the fridge for 4-8 hours. Any longer and you risk that the acid from the lime will begin to cook the pork.
Approximately 30 minutes before grilling, remove the pork and the extra marinade from the fridge.
When grill is heated to 450 or so, grill the pork until the medium, about 7 or 8 minutes each side or internal temp is about 140 degrees.
Once cooked, remove from heat and place in heavy duty foil — use the foil to make a basket. Pour the marinade you had in the fridge (not the stuff the raw pork was marinating in) over the pork and crimp the edges tightly. Let rest approximately 10 minutes.
Slice and serve!
.


