Archive
Pork Tacos
I’ve lived in Pittsburgh for 35 years and for as long as I can remember, weather in this town has always been a major topic. Perhaps it is because the city is made up of so many different types of personalities, that weather becomes the one thing everyone relates to. I get it, but must we obsess? Must our newscasts devote more than just a minute or two discussing what anyone who has looked or been outside already knows? Must everyone (and their mother) post a picture of the temperature on Facebook? January and February it gets very cold and it snows. In the summer months its hot and humid. That’s fact in Pittsburgh – no need to dwell and complain.
Since it is late June and usually that means its hot, sometimes more hot than normal temps (notice I’m stating fact, not complaining), the last thing I want to do is cook. But alas, I have a family to feed and a blog to write (although the latter is obviously optional).
When the dew point is high and temperatures begin to creep up, grilling becomes my best cooking option. However, I understand some of my readers may be intimidated by the grill (i.e. bored of the grilled goodness category), so I’m going with a crock pot recipe (which is the next best cooking option when its hot). If you want to grill, check out my grilled pork tenderloin recipe and serve it up on a tortilla using any toppings you wish.
Whether you fire up the grill or use the crock pot recipe below, you’ll find both recipes are a cinch to make. They’ll easily feed a family of 4 (with leftovers) and most importantly neither one will heat up your kitchen on those hot summer days. I recommend mixing up a delicious frozen Margarita to beat this EXTREME HEAT. Now if you will excuse me, I need to wipe the sweat from my brow.
Ingredients:
- 1 large or 2 small pork tenderloins (about 1.5 lbs)
- 2 cups of chicken stock (or 1 cup stock, 1 cup water)
- 1 package of taco seasoning
- 1 can of pinto or black beans, drained and rinsed (14 ounce)
- 1 can of diced tomatoes (14 ounce)
- 1 can of green chilies, diced (4 ounce)
- 1 package of frozen corn
- 16 corn tortillas
- Garnish: Cilantro and Cotija, Queso, or cheddar cheese
Mix together the broth and taco seasoning.
Next, add all ingredients except corn and tortillas to the crock pot cover and cook on low for 8 hours.
Once the pork is cooked, shred it and add back to the pot. Add frozen corn, stir. Let cook another 30 minutes.
When ready, warm tortillas using a skillet heated with olive oil (30 seconds per side). Place in a warmer (or between a few sheets of paper towels) until ready to use.
Using TWO corn tortillas for each taco (or 1 flour tortilla) add a few heaping spoonfuls of the cooked pork mix using a slotted spoon. Top with cheese and cilantro. Finish with a fresh squeeze of lime juice. ENJOY!
Simple Grilled Chicken
I like to splurge on meals from time to time (lobster rolls and high quality steaks come to mind). But for the most part I’m pretty frugal when it comes to shopping. I try to plan my meals based on what’s on sale and the majority of the time I head to the grocery store with a list to keep me on track. If you look close at the pictures of the ingredients on most of my blog entries, you’ll often see store brand items. I used to clip coupons but I think those extreme-coupon people ruined it for us little folk and it doesn’t seem worth it these days. With the economy rough, I have to cut back when I can.
So when looking for that inexpensive ingredient on which to base a good dinner, I often turn to the simplicity and versatility of dark meat chicken.
Using well-stocked pantry items, I can usually feed the whole family for less than 5 bucks. Catch it on sale and its even cheaper. Not only is it inexpensive, the combinations of flavors are endless.
Want Asian flavors? Use soy sauce and ginger. Game day? Try going “buffalo style.” Want something everyone loves? Add a spice rub and your favorite bbq sauce. Not feeling anything in particular? Keep it simple and refreshing and give this recipe a try.
Ingredients:
- 6-8 pieces chicken (dark meat)
- 3 Tablespoons Soy Sauce
- 2 Tablespoons Honey
- Tablespoon of Olive, Canola, or Vegetable Oil
- Juice of 1 lime
- 1 Clove Garlic, minced
- Cilantro (about 2 tablespoons roughly chopped)
Add all ingredients in a bowl, whisk to combine.
Place chicken in a zip-top bag.
Pour ingredients over chicken and seal, getting as much air out as possible.
Let sit at room temperature 30 minutes (or refrigerate as long as overnight — preferred)
Grill chicken on high heat 2-3 minutes per side.
Lower grill to low heat and continue grilling approximately 25-30 minutes or until internal temperature reaches 180 degrees (or juices run clear).
Kicked-Up Mac-n-Cheese
Before I dive in to my latest recipe, you may have noticed a change to the look of my blog. There was something about the old format that I didn’t like. Perhaps, its just my a.d.d. kicking in. Either way, I think I like this theme better and I’m going to stick with it….for now.
Growing up I had my fair share of macaroni and cheese. More often than not, it was the blue-box variety. I’m not opposed to the orange powdery concoction, and on occasion I even crave it . But most of the time I make it homemade. While its bad for you no matter how you spin it, homemade has to be better than the chemicals out of the box. Not to mention, I think it can be made from scratch in almost the same amount of time as the boxed kind (providing you don’t bake it)
When I make it homemade, I like to experiment with all sorts of cheeses. If I have leftover cheese from a get together, in the melting pot they go. Although I like to experiment, I typically stick to cheeses that melt easily. For me, Gouda, Fontina, and Cheddar work best.
For my latest attempt of this cheesy family favorite casserole, I decided to bring some heat to the party by using pepper-jack. I combined that with some bacon and diced jalapeno, for my kicked-up Mac-n-Cheese.
I think this recipe is a nice flavor and isn’t too spicy, but my step-son, who obviously likes it spicier wanted more heat. That being said, this recipe is a guideline. Feel free to use as much (or as little) spice as your (or your kids) heart desires.
Ingredients:
- 2 Tablespoons butter
- 2 Tablespoons flour
- 2 cups of whole milk, brought to room temperature
- 5 slices of thick cut bacon, cut in to pieces
- 1 box of elbow noodles
- 8 oz pepper jack cheese, shredded
- 8 oz cheddar cheese, shredded
- 1/2 of one jalepeno, diced, seeds and membrane removed (or kept intact for more heat)
- 1 pinch of nutmeg
Cook bacon until crisp, drain on paper towel and set aside.
Preheat oven to 375 and boil noodles according to directions. Drain and add to a casserole dish.
Meanwhile, in a medium size pot, melt butter over medium low heat, add flour. Stir and cook approximately 2 minutes (to make a roux).
Next, add milk and stir until warm and incorporated with the roux.
Add half of the cheese, stir until melted.
Add bacon and jalapeno, stir.
Add remaining cheese, except 1/4 cup and stir.
Once all the cheese is melted, add nutmeg and stir.
Pour over noodles and top with the remaining cheese.
Bake, uncovered 30 minutes or until top cheese is golden and bubbly.
Lobster Rolls
“Hello again, its been too long…..”
I don’t have a ton of followers so maybe nobody noticed I was gone. However, for those that do follow, my wife and I just got back from a short, much needed vacation. We spent 4 days in Virginia. 2.5 days on a working cattle farm in the mountains near George Washington National Forest and 1.5 days touring vineyards on the wine trails outside of Charlottesville. 2 trips in one…but each enjoyable in their own way.
During our stay in the mountains we rode bikes, drove a golf cart around the 300 acre farm, swam, lounged, read, and watched plenty of wildlife (newly born deer, cows, a black bear cub — sans mama, and 2 highly entertaining hummingbirds to name a few).
We also drank a few beers and cocktails.
And of course we ate!
The farm was extremely relaxing but it was fairly remote. Therefore I had to do all of the shopping before we left. I had to plan breakfast, lunch, and dinner for the days on the farm. While I enjoy cooking, I didn’t want to spend my entire vacation slaving over a stove. I chose meals that I could grill, were quick, and didn’t require a lot of prep work. With list in hand I headed to the grocery store where I picked up steak, a few pork chops to make basil garlic grilled pork chops, and a pork tenderloin for grilled pork tacos. I picked up hot dogs and hamburgers too.
But while shopping a big sign caught my attention. “LOBSTERFEST!” All whole lobsters were on sale. $6.99 or $8.99 each depending on if you bought them live or steamed.
How could I pass up this bargain? Answer was, I couldn’t. I searched the cooler and found 2 of the biggest ones I could find. They were all the same price so I might as well get the most meat I could. Without question lobster rolls would be what I would make with my impromptu purchase. The rolls were a delectable option for a lunch while sitting poolside even if I had to endure the snide comment of my wife who said “you know, most people don’t make lobster rolls on vacation.” To which I replied, “its good right?” She just smiled that beautiful smile.
Ingredients:
- 2 Whole Maine Lobsters, Steamed
- 1 1/2 tablespoons of mayonnaise
- Kosher Salt and Pepper to taste
- Lemon Wedges
- Hot Dog Rolls (top split if you can find them)
Gently crack open each lobster, keeping as much of the meat whole as possible.
Chop the lobster in to large size pieces and add to a large mixing bowl.
Add mayonaise and a little salt and pepper and gently fold the ingredients to incorporate, trying not to break the lobster.

The goal is to taste the lobster, not the mayo…so just a little bit of mayo is all that’s needed to bind.
Fill rolls with lobster (I added a few pieces of iceberg for texture) and top with a fresh squeeze of lemon juice.
Meatball and Eggplant Sandwich
I love a good meatball sandwich, but the main problem is that a round piece of anything doesn’t particularly work well as a sandwich. It’s clumsy to eat. Sometimes the meatballs roll off, creating a mess. Other times the placement of the meatball forces me to take a half-bite…maybe even a bigger bite than I otherwise would attempt. Perhaps I’m alone in this, but I’m confused at the success of this awkward sandwich.
So one day while watching an episode of Food Network’s “Sandwich King”, it provided me with that “ahh ha” moment. The show, all about sandwiches, featured something that I wish I thought of — a flat meatball sandwich. Brilliant!
OK, so you’re thinking that a flat meatball has been around a long time — it’s called a hamburger. Not quite. For me, a hamburger showcases the excellent beefy flavor. The meatball on the other hand is designed to showcase all of the ingredients giving it that distinct Italian flavor profile. Then when you top the meatball with fresh ingredients such as roasted red peppers and fresh mozzarella, you begin to see the separation.
I drew inspiration for this sandwich from Jimmy & Nino’s Italian Market in Pittsburgh famous “Strip District.” Their sandwich, known as the Meatball-Eggplant Duo is very good, but I think my version is good as well….and much easier to eat.
Ingredients:
- 1 pound of meatball mix (see my recipe here)
- 1 small eggplant, sliced in to 3/4 inch rounds
- Roasted Red Peppers
- Fresh Mozzarella, sliced
- Kosher Salt
- Fresh Ground Pepper
- Ciabatta Bread (or other crusty bread)
Place eggplant rounds on a wire rack. Sprinkle both sides with kosher salt to draw out excess moisture and bitterness.
Wait about 15-20 minutes then blot dry with paper towels.
Preheat grill to medium-high.
Take the meatball mix and form a patty about 1/2 inch thick. Grill approximately 3-4 minutes on each side. (Could also be baked or pan fried).
Brush eggplant on both sides with olive oil. Sprinkle salt and pepper on each side. Grill approximately 3-4 minutes on each side (Can also be roasted).
When finished, remove from grill and place in a bowl covered with plastic wrap. This will steam the eggplant to make it a tad bit softer. Let sit 10 minutes (more or less depending on desired texture).
Brush olive oil on bread, grill just a minute or two for crunch.
When bread is grilled, assemble the sandwich by first adding the meatball patty. Top with eggplant, cheese, then peppers. Drizzle the with olive oil. Sprinkle with salt and pepper. Enjoy!!
Meatballs
Everyone has that special recipe that they hold near and dear to their heart. Typically its a family favorite handed down from generation to generation. Something so special that you’ve contemplated putting it in a safety deposit box for fear it may be lost or stolen. But what if that recipe never even existed, even though you thought it should have?
I previously mentioned that my mom was born in Italy. Therefore she certainly had a special meatball recipe, right? How could a woman who cooked as well as she did not bring her version of this tasty concoction with her when she left the old country? The meatball was born there. So was she. What the hell! WHY?????
This is a woman who had hundreds of recipes written on everything from traditional note cards to the back of a napkin, but nary a meatball recipe in the lot. I cringe at the thought that I don’t have a handed down recipe of this Italian born round mound of meat.
But wait, did she even make meatballs? Surely I would remember this. If she made them I probably helped. I helped in the kitchen whenever I could and this would be no exception. But zero memories. Nada. Zip. Zilch.
So maybe the recipe isn’t missing….maybe it never even existed.
Ingredients:
- 1 1/2 pounds Ground Chuck
- 1/4 pound Ground Pork
- 4 slices of soft white bread, crust removed, cubed (soaked in 4 tablespoons of milk, then squeezed to remove excess moisture)
- 2 Eggs
- 1/2 cup of grated romano cheese
- 2 cloves garlic, minced
- 1 small bunch of fresh parsley, chopped
- 1/2 tablespoons salt
- 1/2 tablespoon ground pepper
Preheat oven to 375 degrees.
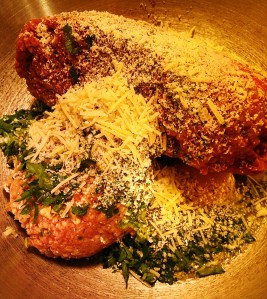
Place all ingredients in a large bowl.
Using your hands, mix all ingredients until well incorporated. Try not to over mix as this may cause the meatballs to get tough.
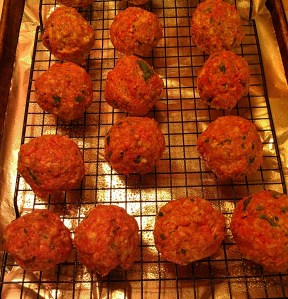
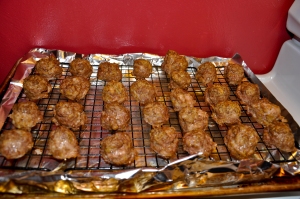
Using a scoop (for uniformity) or your hand, form in to balls (roughly the size just smaller than a golf ball) and place on a wire rack on a sheet pan lined with foil.
Bake on a wire rack in oven for 10-15 minutes until golden brown and no longer pink inside.
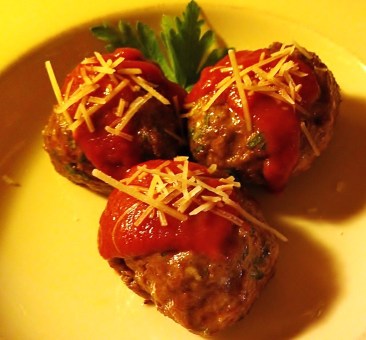
Add as a side dish to (my) pasta or serve as is, topped with sauce (which I’ll blog about soon) and grated cheese.
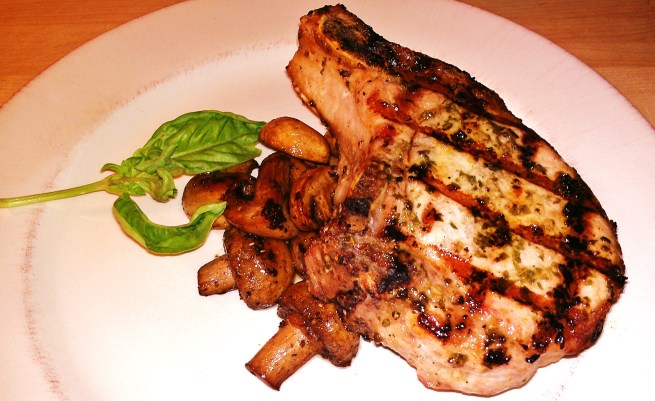
Basil-Garlic Rubbed Grilled Pork Chops
Recently I came across a recipe for grilled pork chops that I couldn’t wait to try. The picture of them looked fantastic and with the simple, fresh ingredients, it sounded like a winning combination.
I made a special trip to the store and dashed to the butcher counter. There I would have the butcher hand pick a few of the best looking, thick, bone-in chops I’d ever buy. I thought he would be annoyed when he would pick one, and I would kindly tell him “sorry, but could I have the one next to it.” Some people don’t do this and settle for pre-packaged shrink wrapped meat, but I say if I’m paying for it, I should get what I want. You should too.
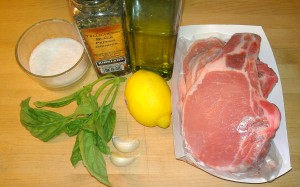
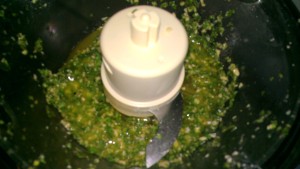
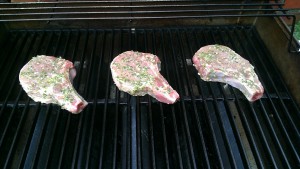
Once home, I assembled the ingredients (minus the pork) and gave them a quick death via the food processor to make a nice green paste. With my silicon pastry brush in hand I was happier than Bob Ross (rest in peace) as I painted my pork chops with the phenomenal smelling mix.
After an hour or so in the fridge, all that was left to do was fire up the grill. I stepped outside, lit the grill and impatiently waited for it to pre-heat. I needed some serious heat to acheive the kind of sear I wanted on these beauties.
With the heat from the grill at nearly 500 degrees, I gently placed the chops atop the grates. The sound of the meat sizzling as it hit the heat was music to my ears.
Then, out of nowhere the wind picked up and the sky turned to black. The heavens were about to unleash grilling hell upon me.
With the chops sizzling away, there was no turning back. I simply had no choice other than to finish what I started.
But it wasn’t about me. I could care less how wet I got. It was about those glorious hand picked chops. Would I be able to achieve the success I was looking for while darting in and out of the rain (for the record, an umbrella would not have helped here)? I needed to cook for a few minutes, rotate, flip, cook, rotate. Each time I would need to lift the lid, exposing the meat to buckets upon buckets of H2O. Could I pull it off? Would these be the pork chops I had hoped they would be when I first saw the recipe or would they land on my plate as mediocre hunks of the other white meat?
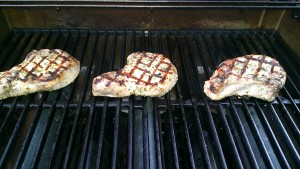
With the chops fully cooked (plus 5 minutes of rest and relaxation) it was time to transfer them to the plate for the tasting. Without hesitation I sliced the first bite and stabbed my creation with the steel tines. Fork to meat..fork to mouth. VICTORY!
OK, so after writing this I realized that I really, REALLY, over-dramatized the situation. Yes it rained and yes it sucked and that was my point. I just hate to grill in the rain. But for these chops, which I think were the best chops I’ve ever tasted, I’d do it all over again.
Ingredients:
- 3 or 4 thick cut bone-in pork chips
- 2 garlic cloves
- 1/2 cup fresh basil leaves
- 2 tablespoons of lemon juice
- 2 tablespoons of extra-virgin olive oil
- 1 teaspoon of kosher salt (or course salt)
- 1/2 teaspoon of fresh ground pepper
While the food processor is running, add the garlic to mince. Stop and add the basil and pulse to chop. Stop. Add lemon juice, olive oil, salt, and pepper and process to make a thin wet paste.
Spread mixture on both side of pork and let stand at least 15 minutes (up to 2 hours in the fridge – which is what I did).
Preheat grill to high.
When grill is hot, place the chops on the grates and grill 4 minutes. Rotate the chops one-quarter and grill 2 additional minutes.
Flip then grill for 3 minutes. Rotate one-quarter and grill an additional 2 minutes.
Remove from grill and let rest 5 minutes (if you can).
ENJOY!
Deep Dish Pizza
In my last blog entry I talked all about pizza. Locally, pizza is mainly a spin-off of the thin, New York style, which is my favorite. However, I do like thicker pizza from time to time but I’ve yet to find a really good version in Pittsburgh. Therefore I’ve resorted to making my own and I make it Chicago style.
If you’re not aware, Chicago style pizza is basically the exact opposite of any sort of traditional pizza. Instead using your hands, this thicker, pie like crust, is often eaten with a knife and fork. The cheese, followed by other toppings, are on the bottom, closest to the crust, with the sauce being the last layer on top. It’s a great alternative to your everyday pizza and pretty simple to make at home.
Ingredients:
- Basic Pizza Dough (follow the same recipe in the grilled pizza entry found here)
- Italian Seasoning
- Mozzarella Cheese (I use slices for this recipe instead of shredded)
- Pizza Sauce (homemade preferred or a good quality brand from your store or if you can, an Italian market)
- Pizza Toppings of your choice
Preheat oven to 400 degrees.
Spray the bottom of a 9 inch pie pan with cooking spray (olive oil spray if you have it).
Take dough and spread it in the pan, making a well to hold the toppings. If the dough bounces back, let it rest a few minutes then spread it again. The dough should cover the entire bottom of the pan, very much like a pie crust.
Sprinkle the dough with Italian seasoning.
Top with the cheese.
Add toppings. (This version used pepperoni, mushrooms, and banana peppers)
Top with Sauce. Be sure to keep all of the ingredients in the “well” that you made. (I added a few extra sprinkles of Parmesan cheese, but this is optional)
Bake approximately 20-25 minutes until edge of dough is golden brown.
Let rest approximately 2-3 minutes and remove from pan. (the pan should be greased enough from the cooking spray plus the olive oil that was on the dough, making the whole pizza slide easily out of the pan which, in my opinion, makes cutting easier).
Enjoy!
Grilled Pizza
Can you remember the first time you ever had pizza? If so, it was probably a wonderfully made slice from your local pizzeria. Just the right amount of sauce, maybe a little grease from the pepperoni dripping down your chin, and of course that long strand of gooey cheese. Pizza that looks and smells so good that you can’t wait for it to cool and risk burning the roof of your mouth. That’s good pizza!
My first memory of pizza was from a shop on Pittsburgh’s South Side called DeSalla’s which is no longer there. My mom would often bring some home after a night out at Bingo. Probably her way of thanking me for putting up with another sitter. DeSalla’s pizza was square and the crust didn’t seem particularly homemade. The cheese was never fully melted either so I’m not sure it was real cheese. The sauce was a thin layer with a nice hint of oregano, something I really like. I ate their pizza on many occasions but looking back on it, it wasn’t really all that good. But despite my thoughts of it now, I’d still love to have a few slices, just to bring me back to my childhood. That’s the power of food.
When it was time for me to start high school, the City of Pittsburgh City wanted to better integrate students. So instead of going to a high school in my neighborhood, I was bused about 20 minutes to a neighborhood unfamiliar to me. I didn’t mind as it allowed me to meet lots of new people and some lifelong friends. It also allowed me to discover Fiori’s Pizza which remains my favorite to this day.
Fiori’s is located in Pittsburgh’s Brookline neighborhood and the only way to describe their pizza it that it is freaking delicious. A perfect sauce to cheese ratio and an excellent chewy crust. Magnificent!! In a city saturated with pizzerias Fiori’s thrives despite the fact that its in a horrible location (parking nightmare), doesn’t have delivery, and only accepts cash. If you’re ever in Pittsburgh, you have to stop by and “they fix you up.”
While Fiori’s is my favorite for take out, our family likes to experiment with all sorts of pizza’s at home. This recipe is my grilled pizza. You can make it over charcoal or gas but the the key is to make it without using a pizza stone to get those wonderful grill marks.
Grilling pizza is easier than you think once you get the technique down. And after you taste it once, you’ll want to make it over and over again, experimenting with all sorts of different toppings.
The recipe below is for homemade dough, but quite often I’ll go to my local bakery and buy their pizza dough. It’s only a buck and its very good. Also, try your local pizzeria, they’ll most likely sell you a ball or two of their dough.
Ingredients (makes 2-12 inch crusts):
- 3 cups all purpose flour (plus more for dusting)
- 1 teaspoon kosher salt
- 2 tablespoons of olive oil (plus more for brushing on the dough prior to grilling)
- 2 tablesppons of sugar
- 1 (1/4 ounce) package of yeast
- 1 cup of warm water (not hot)
- Plus ingredients for *toppings
Combine the sugar, water and yeast in a measuring cup and let the yeast “bloom”
In a **food processor add the flour and salt. Pulse a few times to combine.
Then, with processor on dough setting, slowly add the yeast mixture until its incorporated with the flour. Drizzle in olive oil.
When you have a good ball, take it out and place in a large bowl.
Coat the ball in olive oil and cover with a warm damp towel. Place the bowl in a warm place (I put it on top of my stove under the lights from the range hood) and let rise until it doubles in size, about 1 hour or so.
When the dough has finished rising, divide the dough in half to form 2 same sized balls.
Working one dough ball at a time, place on floured or oiled surface and work the dough to the shape of a pizza. It doesn’t have to be perfect — its homemade, it should look rustic.
Meanwhile, preheat your grill to at least 500 degrees (over direct heat if using charcoal but set it up the grill with a cool zone). After grill is preheated, brush the grill grates with oil to prevent the dough from sticking.
When your dough is ready, place it on a pizza peel. (if you don’t have one its going to be tricky but still can be done by placing your dough on the bottom of a baking tray pan (i.e. cookie sheet).
Brush the top of the dough liberally with olive oil.
Place your dough on the grill, oil side down (I do this by quickly flipping my peel over on to the grill – if you don’t have a peel, carefully but quickly lay the dough on the grill by grabbing it by the top and folding it on to the grill). Immediately brush the top (the dry side) with olive oil.
After about 2 minutes, flip the dough to cook the other side.
Add your toppings to the cooked side, and lower your grill burners as low as they will go. Close the lid of your grill to heat your toppings/melt cheese. If using a charcoal grill, you’ll want to cook the second side of the pizza over direct heat then add toppings and move to the cool side to finish.
Remove from grill. Wait a few minutes before slicing (you won’t want to wait) and enjoy!
*Pre-cooking any raw toppings such as sausage is essential as grilling pizza does now allow time to properly cook certain toppings. Veggies such as green peppers would also benefit from a pre-cook.
** If you don’t have a food processor, this can also be done in a stand mixer or old fashioned kneading with your hands.
When I make grilled pizza’s, the family and I try all sorts of topping combinations. Our favorites include:
Goat Cheese, Spinach, Mushroom, Kalamata Olives & Prosciutto (pictured at top)


