Archive
Thanksgiving Leftovers Sandwich
Thanksgiving Twenty-Thirteen has come and gone. Unfortunately, the added pounds and leftovers did not go with the change of the calendar. However, I’m here to help you with one of those problems. Sadly, you’ll have to deal with the pounds yourself.
Last year, I blogged about the Thanksgiving Burrito. That monster is a good way to rid yourself of those Thanksgiving goodies.
The Thanksgiving sandwich, for all intents and purposes, is the same as the burrito, only in sandwich form. And for my money, its my personal favorite way to eat the Thanksgiving leftovers.
For one, fresh baked bread (homemade or from your local bakery) out weighs a tortilla any day of the week (unless of course you’re eating a mexican style burrito which would be extremely difficult to eat between two slices of bread. Then again…..hmmmm….).
A burrito might be easier to eat, but I believe that a properly constructed sandwich allows all of the ingredients to meld together and I don’t think you can get the same thing when its rolled up.
And lastly, its grilled. With butter!!!
Winner by majority decision, the sandwich. (although you can’t go wrong with either).
While I am providing a detailed recipe, please use it very loosely, but I do think the order you assemble it is important.
Also, if you don’t like cranberry sauce, feel free to omit, but it really is, in my opinion, the essence of this sandwich.
Enjoy!
INGREDIENTS:
DIRECTIONS:
|
Cardamom-Wild Flower Honey Sauce
Earlier in the week Darcie got the “Hey, wanna go to the outlets?” text from our good friends Chuck and Josh.
Anyone that knows me understands that I was not part of this invite because I hate shopping (unless its to shop for a cooking gadget, food, electronics or a new car).
Not only do I dislike shopping, I also have slight fear of *Darcie shopping with Chuck and Josh (or anyone really).
Why? First, she’s a woman. Second, she’s never met a pair of shoes or a purse that she doesn’t feel deserves a good home. And finally, well, we’re not exactly Bill and Melinda Gates.
(*Note: Darcie actually does very well, and never overspends – and today she bought stuff for me. Probably good that she did since I refuse to part with a Polo shirt that I’ve probably had well over 10 years now).
Anyway, despite my disdain for shopping, Chuck and Josh’s invite to take Darcie shopping provided me an opportunity to whip up breakfast for a crowd which is more my cup of tea.
I kept it fairly simple. Darcie, with her mad baking skills, made homemade buttermilk biscuits. I made the homemade sausage and gravy to smother said biscuits. I also whipped up a zucchini and egg fritatta.
I’ll blog these dishes in the near future but today, I’m blogging about something I didn’t even make.
See, even though our friends asked what they could bring, we informed them we had it covered. But of course, this is Chuck and Josh, and they don’t show up anywhere empty handed. Which, in this instance I’m glad they didn’t.
Chuck made 2 amazing pastries. The first was a fig tart with a goat cheese spread. The second, and the star of today’s show was a cinnamon twist with a Cardamom-Honey Dipping sauce. The twist would have stood just fine on its own but when dipped in the sauce it went to the next level.
Amazing!
The sauce was sweet with a hint of spice. It was vibrant and bursting with citrus. With all the other food we had, this was all I wanted. Since there was a lot, I couldn’t wait to find uses for the remaining sauce that was left behind.
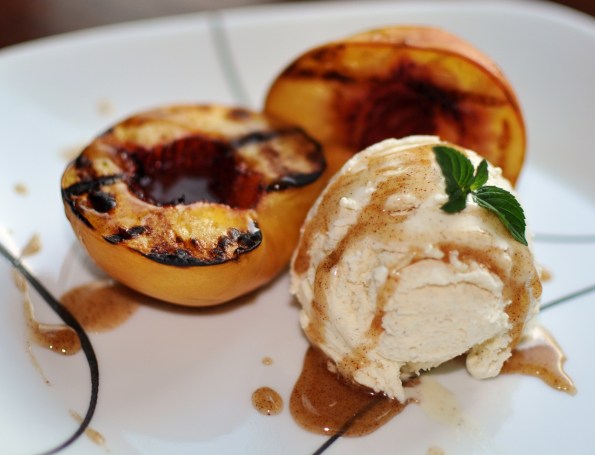
The first thing that came to mind was using this sauce drizzled over some grilled peaches and vanilla ice cream.
Winner!
I also think it would be good in tea (hot or iced) which I’ll try very soon.
The recipe for the sauce was taken directly from the Food Network but adapted slightly first by cutting the recipe in half (the original portion makes way too much) and by using wildflower honey instead of the more commonly found clover honey. Enjoy!
Ingredients:
|
Grilled Pizza – Part II
With grilling season winding down for a lot of people I thought I’d do a second installment of grilled pizza just to remind people that you shouldn’t be afraid to try this method.
You can find the instructions, as well as some flavor combinations in my original grilled pizza blog entry here.
Here are my 4 grilled pizza promises:
I promise, if done properly, your dough won’t fall through or stick to the grill grates.
I promise that you will have some pretty darn tasty pizza.
I promise you’ll want to experiment with the endless combinations of toppings.
I promise that you will want to have a pizza party and impress your friends.
Because for some, it will become an addiction, I cannot promise a reserved seat in grilled pizza rehab.
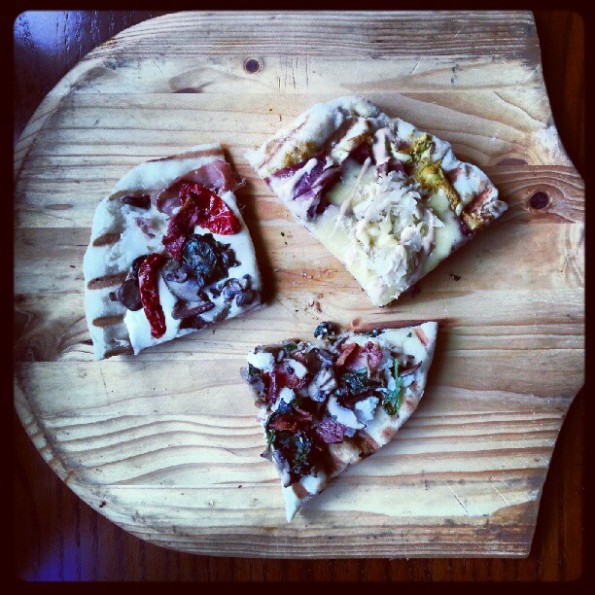
Since grilled pizza is somewhat my latest addiction, I thought I’d give a couple of new combinations a try. Instead of one large pizza, I (with Darcie, my sous chef for the evening by my side) made 3 mini-pizzas (technically 4 which I’ll explain shortly).
The first one was bacon, spinach, mushrooms, and fresh ricotta. We’ve done a similar version so what made this stand out was the ricotta. The crust was brushed lightly with a garlic butter. Not a bad combination at all.
The second pizza had the same crust base (butter/garlic) but was topped with prosciutto, roasted tomatoes, mushrooms, and fresh mozzarella. The salt of the prosciutto combined with the sweetness of the roasted tomatoes made this my favorite of the samples.
Finally, for the final pizza I made a Reuben pizza. Basically, the Reuben pizza was exactly like the sandwich, only in pizza format.
Initially when the Reuben pizza came to my mind I thought it would be as simple as copying the sandwich. However, I was afraid the Thousand Island Dressing as the base would make the pizza too soggy. So I talked it over with the wife and she agreed but we couldn’t agree on how to improvise. So we came up with 2 options (his and hers).
Her version had a plain crust with a very light sprinkle of Swiss to act as the glue. Then a layer of corned-beef, sauerkraut, Swiss cheese and a drizzle of Thousand Island.
My version used a spicy brown mustard as the base. Then corned-beef, sauerkraut, Swiss and topped with Thousand Island.
Both were very good in their own ways, especially if you like Reuben’s. Her version was probably closer to a real Reuben while my version was more like a version you’d find in a good New York Deli.
If I did it again, I’d probably use wheat dough and sprinkle in some caraway seeds.
The Reuben Pizza experiment wasn’t perfect but it still wound up being delicious. Here is “his” version of the Reuben Pizza. Enjoy!
Ingredients:
- Basic Dough
- Brown Mustard (enough to put a thin coat on the crust)
- 1/2 pound corned-beef, cut in to squares (don’t skimp here — spend a little extra and get the good stuff)
- Sauerkraut (more or less based on your preference)
- 1 1/2 cups Swiss cheese, grated
- Thousand Island Dressing
Follow instructions to make pizza dough and shape in to desired size.
Paint the crust a thin layer of mustard.
Top with corned beef, sauerkraut, and cheese.
When the pizza is finished, drizzle the entire pizza with the Thousand Island Dressing.
Cuban Sandwich with Chipotle Butter
Anyone with a food blog must love cooking, why else would we take the time to write about it. However, there are times where I’m too busy (read lazy) to do anything elaborate. Those days require a good old-fashioned sandwich.
Lucky for me, I happen to love sandwiches.
While I have many favorites, I’m particularly fond of pastrami on rye, classic grilled cheese, and my all-time favorite Italian subs.
Slowly moving up my list of favorites is the Cuban.
On the surface, the Cuban, traditionally made with pork, ham, and Swiss cheese seems like a fairly basic sandwich. But when you put it all together with the pickles and mustard, it’s quite amazing. But what really separates the Cuban from just another grilled sandwich is the crunchy texture it takes on by literally smashing it when grilling.
Personally, I don’t think a sandwich press can get it right (plus I don’t have one). Therefore I use a couple of heavy bricks wrapped in foil. It’s a great technique that can also be used when grilling a whole chicken (but that’s another day).
Here’s my version of the Cuban sandwich that adds just a touch of heat in the form of chipotle pepper butter. If you don’t want the heat, feel free to use plain butter.
Ingredients: (no quantities of meat etc. listed – use as much or as little as you like)
- 2 Tablespoons butter, softened
- 1 chipotle pepper in adobo sauce, minced (seeds removed – optional)
- 1 loaf of cuban bread (I used French but you can use any similar crusty exterior bread)
- Roasted Pork (I use leftover from any time I make a pork roast)
- Virginia Ham
- Swiss Cheese
- Pickles
- Mustard
To make the chipotle butter, mix 1 chipotle pepper with the softened butter. Set aside.
Cut bread lengthwise and apply a generous amount of mustard to one side of bread. Add ham, pork, pickles, and cheese. Top with other half of bread.
Slater the top of the sandwich with half of the chipotle butter.
Lay sandwich on grill or griddle (or large pan) butter side down. Gently lay brick on top of sandwich and smash the sandwich to balance the brick.
Grill a few minutes until cheese begins to melt.
Remove brick (careful, brick may be hot) and flip. Slather with remaining butter and flip.
Once again, balance brick and grill a few more minutes until heated through.
Remove from grill and enjoy!
Pork Tacos
I’ve lived in Pittsburgh for 35 years and for as long as I can remember, weather in this town has always been a major topic. Perhaps it is because the city is made up of so many different types of personalities, that weather becomes the one thing everyone relates to. I get it, but must we obsess? Must our newscasts devote more than just a minute or two discussing what anyone who has looked or been outside already knows? Must everyone (and their mother) post a picture of the temperature on Facebook? January and February it gets very cold and it snows. In the summer months its hot and humid. That’s fact in Pittsburgh – no need to dwell and complain.
Since it is late June and usually that means its hot, sometimes more hot than normal temps (notice I’m stating fact, not complaining), the last thing I want to do is cook. But alas, I have a family to feed and a blog to write (although the latter is obviously optional).
When the dew point is high and temperatures begin to creep up, grilling becomes my best cooking option. However, I understand some of my readers may be intimidated by the grill (i.e. bored of the grilled goodness category), so I’m going with a crock pot recipe (which is the next best cooking option when its hot). If you want to grill, check out my grilled pork tenderloin recipe and serve it up on a tortilla using any toppings you wish.
Whether you fire up the grill or use the crock pot recipe below, you’ll find both recipes are a cinch to make. They’ll easily feed a family of 4 (with leftovers) and most importantly neither one will heat up your kitchen on those hot summer days. I recommend mixing up a delicious frozen Margarita to beat this EXTREME HEAT. Now if you will excuse me, I need to wipe the sweat from my brow.
Ingredients:
- 1 large or 2 small pork tenderloins (about 1.5 lbs)
- 2 cups of chicken stock (or 1 cup stock, 1 cup water)
- 1 package of taco seasoning
- 1 can of pinto or black beans, drained and rinsed (14 ounce)
- 1 can of diced tomatoes (14 ounce)
- 1 can of green chilies, diced (4 ounce)
- 1 package of frozen corn
- 16 corn tortillas
- Garnish: Cilantro and Cotija, Queso, or cheddar cheese
Mix together the broth and taco seasoning.
Next, add all ingredients except corn and tortillas to the crock pot cover and cook on low for 8 hours.
Once the pork is cooked, shred it and add back to the pot. Add frozen corn, stir. Let cook another 30 minutes.
When ready, warm tortillas using a skillet heated with olive oil (30 seconds per side). Place in a warmer (or between a few sheets of paper towels) until ready to use.
Using TWO corn tortillas for each taco (or 1 flour tortilla) add a few heaping spoonfuls of the cooked pork mix using a slotted spoon. Top with cheese and cilantro. Finish with a fresh squeeze of lime juice. ENJOY!
Simple Grilled Chicken
I like to splurge on meals from time to time (lobster rolls and high quality steaks come to mind). But for the most part I’m pretty frugal when it comes to shopping. I try to plan my meals based on what’s on sale and the majority of the time I head to the grocery store with a list to keep me on track. If you look close at the pictures of the ingredients on most of my blog entries, you’ll often see store brand items. I used to clip coupons but I think those extreme-coupon people ruined it for us little folk and it doesn’t seem worth it these days. With the economy rough, I have to cut back when I can.
So when looking for that inexpensive ingredient on which to base a good dinner, I often turn to the simplicity and versatility of dark meat chicken.
Using well-stocked pantry items, I can usually feed the whole family for less than 5 bucks. Catch it on sale and its even cheaper. Not only is it inexpensive, the combinations of flavors are endless.
Want Asian flavors? Use soy sauce and ginger. Game day? Try going “buffalo style.” Want something everyone loves? Add a spice rub and your favorite bbq sauce. Not feeling anything in particular? Keep it simple and refreshing and give this recipe a try.
Ingredients:
- 6-8 pieces chicken (dark meat)
- 3 Tablespoons Soy Sauce
- 2 Tablespoons Honey
- Tablespoon of Olive, Canola, or Vegetable Oil
- Juice of 1 lime
- 1 Clove Garlic, minced
- Cilantro (about 2 tablespoons roughly chopped)
Add all ingredients in a bowl, whisk to combine.
Place chicken in a zip-top bag.
Pour ingredients over chicken and seal, getting as much air out as possible.
Let sit at room temperature 30 minutes (or refrigerate as long as overnight — preferred)
Grill chicken on high heat 2-3 minutes per side.
Lower grill to low heat and continue grilling approximately 25-30 minutes or until internal temperature reaches 180 degrees (or juices run clear).
Meatball and Eggplant Sandwich
I love a good meatball sandwich, but the main problem is that a round piece of anything doesn’t particularly work well as a sandwich. It’s clumsy to eat. Sometimes the meatballs roll off, creating a mess. Other times the placement of the meatball forces me to take a half-bite…maybe even a bigger bite than I otherwise would attempt. Perhaps I’m alone in this, but I’m confused at the success of this awkward sandwich.
So one day while watching an episode of Food Network’s “Sandwich King”, it provided me with that “ahh ha” moment. The show, all about sandwiches, featured something that I wish I thought of — a flat meatball sandwich. Brilliant!
OK, so you’re thinking that a flat meatball has been around a long time — it’s called a hamburger. Not quite. For me, a hamburger showcases the excellent beefy flavor. The meatball on the other hand is designed to showcase all of the ingredients giving it that distinct Italian flavor profile. Then when you top the meatball with fresh ingredients such as roasted red peppers and fresh mozzarella, you begin to see the separation.
I drew inspiration for this sandwich from Jimmy & Nino’s Italian Market in Pittsburgh famous “Strip District.” Their sandwich, known as the Meatball-Eggplant Duo is very good, but I think my version is good as well….and much easier to eat.
Ingredients:
- 1 pound of meatball mix (see my recipe here)
- 1 small eggplant, sliced in to 3/4 inch rounds
- Roasted Red Peppers
- Fresh Mozzarella, sliced
- Kosher Salt
- Fresh Ground Pepper
- Ciabatta Bread (or other crusty bread)
Place eggplant rounds on a wire rack. Sprinkle both sides with kosher salt to draw out excess moisture and bitterness.
Wait about 15-20 minutes then blot dry with paper towels.
Preheat grill to medium-high.
Take the meatball mix and form a patty about 1/2 inch thick. Grill approximately 3-4 minutes on each side. (Could also be baked or pan fried).
Brush eggplant on both sides with olive oil. Sprinkle salt and pepper on each side. Grill approximately 3-4 minutes on each side (Can also be roasted).
When finished, remove from grill and place in a bowl covered with plastic wrap. This will steam the eggplant to make it a tad bit softer. Let sit 10 minutes (more or less depending on desired texture).
Brush olive oil on bread, grill just a minute or two for crunch.
When bread is grilled, assemble the sandwich by first adding the meatball patty. Top with eggplant, cheese, then peppers. Drizzle the with olive oil. Sprinkle with salt and pepper. Enjoy!!
Basil-Garlic Rubbed Grilled Pork Chops
Recently I came across a recipe for grilled pork chops that I couldn’t wait to try. The picture of them looked fantastic and with the simple, fresh ingredients, it sounded like a winning combination.
I made a special trip to the store and dashed to the butcher counter. There I would have the butcher hand pick a few of the best looking, thick, bone-in chops I’d ever buy. I thought he would be annoyed when he would pick one, and I would kindly tell him “sorry, but could I have the one next to it.” Some people don’t do this and settle for pre-packaged shrink wrapped meat, but I say if I’m paying for it, I should get what I want. You should too.
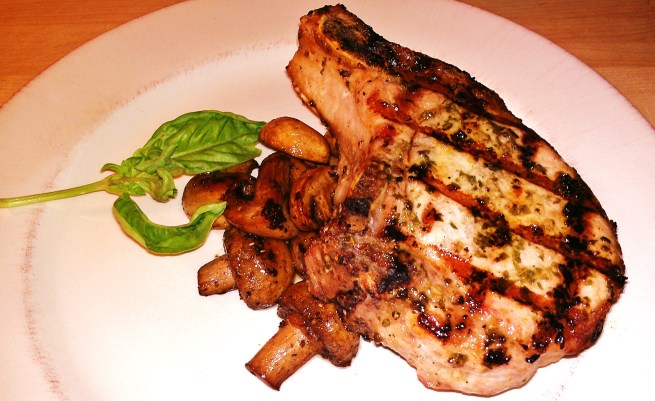
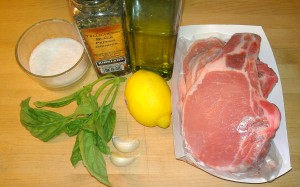
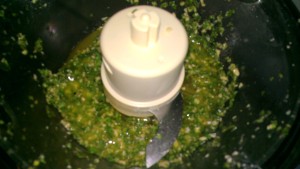
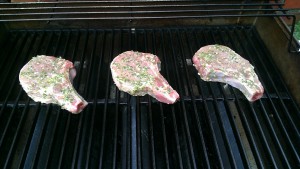
Once home, I assembled the ingredients (minus the pork) and gave them a quick death via the food processor to make a nice green paste. With my silicon pastry brush in hand I was happier than Bob Ross (rest in peace) as I painted my pork chops with the phenomenal smelling mix.
After an hour or so in the fridge, all that was left to do was fire up the grill. I stepped outside, lit the grill and impatiently waited for it to pre-heat. I needed some serious heat to acheive the kind of sear I wanted on these beauties.
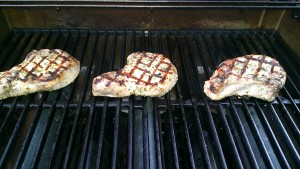
With the heat from the grill at nearly 500 degrees, I gently placed the chops atop the grates. The sound of the meat sizzling as it hit the heat was music to my ears.
Then, out of nowhere the wind picked up and the sky turned to black. The heavens were about to unleash grilling hell upon me.
With the chops sizzling away, there was no turning back. I simply had no choice other than to finish what I started.
But it wasn’t about me. I could care less how wet I got. It was about those glorious hand picked chops. Would I be able to achieve the success I was looking for while darting in and out of the rain (for the record, an umbrella would not have helped here)? I needed to cook for a few minutes, rotate, flip, cook, rotate. Each time I would need to lift the lid, exposing the meat to buckets upon buckets of H2O. Could I pull it off? Would these be the pork chops I had hoped they would be when I first saw the recipe or would they land on my plate as mediocre hunks of the other white meat?
With the chops fully cooked (plus 5 minutes of rest and relaxation) it was time to transfer them to the plate for the tasting. Without hesitation I sliced the first bite and stabbed my creation with the steel tines. Fork to meat..fork to mouth. VICTORY!
OK, so after writing this I realized that I really, REALLY, over-dramatized the situation. Yes it rained and yes it sucked and that was my point. I just hate to grill in the rain. But for these chops, which I think were the best chops I’ve ever tasted, I’d do it all over again.
Ingredients:
- 3 or 4 thick cut bone-in pork chips
- 2 garlic cloves
- 1/2 cup fresh basil leaves
- 2 tablespoons of lemon juice
- 2 tablespoons of extra-virgin olive oil
- 1 teaspoon of kosher salt (or course salt)
- 1/2 teaspoon of fresh ground pepper
While the food processor is running, add the garlic to mince. Stop and add the basil and pulse to chop. Stop. Add lemon juice, olive oil, salt, and pepper and process to make a thin wet paste.
Spread mixture on both side of pork and let stand at least 15 minutes (up to 2 hours in the fridge – which is what I did).
Preheat grill to high.
When grill is hot, place the chops on the grates and grill 4 minutes. Rotate the chops one-quarter and grill 2 additional minutes.
Flip then grill for 3 minutes. Rotate one-quarter and grill an additional 2 minutes.
Remove from grill and let rest 5 minutes (if you can).
ENJOY!
Grilled Pizza
Can you remember the first time you ever had pizza? If so, it was probably a wonderfully made slice from your local pizzeria. Just the right amount of sauce, maybe a little grease from the pepperoni dripping down your chin, and of course that long strand of gooey cheese. Pizza that looks and smells so good that you can’t wait for it to cool and risk burning the roof of your mouth. That’s good pizza!
My first memory of pizza was from a shop on Pittsburgh’s South Side called DeSalla’s which is no longer there. My mom would often bring some home after a night out at Bingo. Probably her way of thanking me for putting up with another sitter. DeSalla’s pizza was square and the crust didn’t seem particularly homemade. The cheese was never fully melted either so I’m not sure it was real cheese. The sauce was a thin layer with a nice hint of oregano, something I really like. I ate their pizza on many occasions but looking back on it, it wasn’t really all that good. But despite my thoughts of it now, I’d still love to have a few slices, just to bring me back to my childhood. That’s the power of food.
When it was time for me to start high school, the City of Pittsburgh City wanted to better integrate students. So instead of going to a high school in my neighborhood, I was bused about 20 minutes to a neighborhood unfamiliar to me. I didn’t mind as it allowed me to meet lots of new people and some lifelong friends. It also allowed me to discover Fiori’s Pizza which remains my favorite to this day.
Fiori’s is located in Pittsburgh’s Brookline neighborhood and the only way to describe their pizza it that it is freaking delicious. A perfect sauce to cheese ratio and an excellent chewy crust. Magnificent!! In a city saturated with pizzerias Fiori’s thrives despite the fact that its in a horrible location (parking nightmare), doesn’t have delivery, and only accepts cash. If you’re ever in Pittsburgh, you have to stop by and “they fix you up.”
While Fiori’s is my favorite for take out, our family likes to experiment with all sorts of pizza’s at home. This recipe is my grilled pizza. You can make it over charcoal or gas but the the key is to make it without using a pizza stone to get those wonderful grill marks.
Grilling pizza is easier than you think once you get the technique down. And after you taste it once, you’ll want to make it over and over again, experimenting with all sorts of different toppings.
The recipe below is for homemade dough, but quite often I’ll go to my local bakery and buy their pizza dough. It’s only a buck and its very good. Also, try your local pizzeria, they’ll most likely sell you a ball or two of their dough.
Ingredients (makes 2-12 inch crusts):
- 3 cups all purpose flour (plus more for dusting)
- 1 teaspoon kosher salt
- 2 tablespoons of olive oil (plus more for brushing on the dough prior to grilling)
- 2 tablesppons of sugar
- 1 (1/4 ounce) package of yeast
- 1 cup of warm water (not hot)
- Plus ingredients for *toppings
Combine the sugar, water and yeast in a measuring cup and let the yeast “bloom”
In a **food processor add the flour and salt. Pulse a few times to combine.
Then, with processor on dough setting, slowly add the yeast mixture until its incorporated with the flour. Drizzle in olive oil.
When you have a good ball, take it out and place in a large bowl.
Coat the ball in olive oil and cover with a warm damp towel. Place the bowl in a warm place (I put it on top of my stove under the lights from the range hood) and let rise until it doubles in size, about 1 hour or so.
When the dough has finished rising, divide the dough in half to form 2 same sized balls.
Working one dough ball at a time, place on floured or oiled surface and work the dough to the shape of a pizza. It doesn’t have to be perfect — its homemade, it should look rustic.
Meanwhile, preheat your grill to at least 500 degrees (over direct heat if using charcoal but set it up the grill with a cool zone). After grill is preheated, brush the grill grates with oil to prevent the dough from sticking.
When your dough is ready, place it on a pizza peel. (if you don’t have one its going to be tricky but still can be done by placing your dough on the bottom of a baking tray pan (i.e. cookie sheet).
Brush the top of the dough liberally with olive oil.
Place your dough on the grill, oil side down (I do this by quickly flipping my peel over on to the grill – if you don’t have a peel, carefully but quickly lay the dough on the grill by grabbing it by the top and folding it on to the grill). Immediately brush the top (the dry side) with olive oil.
After about 2 minutes, flip the dough to cook the other side.
Add your toppings to the cooked side, and lower your grill burners as low as they will go. Close the lid of your grill to heat your toppings/melt cheese. If using a charcoal grill, you’ll want to cook the second side of the pizza over direct heat then add toppings and move to the cool side to finish.
Remove from grill. Wait a few minutes before slicing (you won’t want to wait) and enjoy!
*Pre-cooking any raw toppings such as sausage is essential as grilling pizza does now allow time to properly cook certain toppings. Veggies such as green peppers would also benefit from a pre-cook.
** If you don’t have a food processor, this can also be done in a stand mixer or old fashioned kneading with your hands.
When I make grilled pizza’s, the family and I try all sorts of topping combinations. Our favorites include:
Goat Cheese, Spinach, Mushroom, Kalamata Olives & Prosciutto (pictured at top)


