Archive
Beef and Broccoli
Yesterday, like millions of other people, I flipped my calendar to March. For most, present company included, that means Spring is right around the corner. Looking out my front window this morning, I’m hard-pressed to believe that to be the case. I will try to remain optimistic. IT. IS. NOT. WORKING. I blame it on that rodent.
I need Spring to arrive soon.
I need it to come so I can ride my new bike. I need it so I can see the trees and flowers in bloom. I need it so I can take that first hike along the beautiful trails of Western Pennsylvania. I need it so I can open the windows and feel a decently warm breeze.
But mainly I need Spring to arrive so I can properly wash the cars. They are filthy!
Now granted, I’m not the best when it comes to keeping my car clean year round, but I do love when I rid myself of the reminders of the cold winter. Be gone salt and grime and make way for bird crap!
DAMN IT!
***********************************************************************************************
I often hear that making good Chinese food at home is difficult. This recipe will prove to you that its not.
I adapted this recipe from the bazillion beef and broccoli recipes scattered all over the Internet.
The one common theme I found to have great success with this dish is to slice the beef against the grain then marinade it.
Slicing against the grain is simply examining the beef to find the lines that are all running in the same direction. This is the grain. Now cut against it (not with it). Cutting with the grain will ensure that your beef is extremely “stringy” and tough to chew. This isn’t very tasty.
Taking these steps will ensure your homemade beef and broccoli is Chinese take-out tender.
Enjoy!
Ingredients:For the meat marinade:
For cooking:
Serve with rice or noodles. |
Pork Tacos
I’ve lived in Pittsburgh for 35 years and for as long as I can remember, weather in this town has always been a major topic. Perhaps it is because the city is made up of so many different types of personalities, that weather becomes the one thing everyone relates to. I get it, but must we obsess? Must our newscasts devote more than just a minute or two discussing what anyone who has looked or been outside already knows? Must everyone (and their mother) post a picture of the temperature on Facebook? January and February it gets very cold and it snows. In the summer months its hot and humid. That’s fact in Pittsburgh – no need to dwell and complain.
Since it is late June and usually that means its hot, sometimes more hot than normal temps (notice I’m stating fact, not complaining), the last thing I want to do is cook. But alas, I have a family to feed and a blog to write (although the latter is obviously optional).
When the dew point is high and temperatures begin to creep up, grilling becomes my best cooking option. However, I understand some of my readers may be intimidated by the grill (i.e. bored of the grilled goodness category), so I’m going with a crock pot recipe (which is the next best cooking option when its hot). If you want to grill, check out my grilled pork tenderloin recipe and serve it up on a tortilla using any toppings you wish.
Whether you fire up the grill or use the crock pot recipe below, you’ll find both recipes are a cinch to make. They’ll easily feed a family of 4 (with leftovers) and most importantly neither one will heat up your kitchen on those hot summer days. I recommend mixing up a delicious frozen Margarita to beat this EXTREME HEAT. Now if you will excuse me, I need to wipe the sweat from my brow.
Ingredients:
- 1 large or 2 small pork tenderloins (about 1.5 lbs)
- 2 cups of chicken stock (or 1 cup stock, 1 cup water)
- 1 package of taco seasoning
- 1 can of pinto or black beans, drained and rinsed (14 ounce)
- 1 can of diced tomatoes (14 ounce)
- 1 can of green chilies, diced (4 ounce)
- 1 package of frozen corn
- 16 corn tortillas
- Garnish: Cilantro and Cotija, Queso, or cheddar cheese
Mix together the broth and taco seasoning.
Next, add all ingredients except corn and tortillas to the crock pot cover and cook on low for 8 hours.
Once the pork is cooked, shred it and add back to the pot. Add frozen corn, stir. Let cook another 30 minutes.
When ready, warm tortillas using a skillet heated with olive oil (30 seconds per side). Place in a warmer (or between a few sheets of paper towels) until ready to use.
Using TWO corn tortillas for each taco (or 1 flour tortilla) add a few heaping spoonfuls of the cooked pork mix using a slotted spoon. Top with cheese and cilantro. Finish with a fresh squeeze of lime juice. ENJOY!
Simple Grilled Chicken
I like to splurge on meals from time to time (lobster rolls and high quality steaks come to mind). But for the most part I’m pretty frugal when it comes to shopping. I try to plan my meals based on what’s on sale and the majority of the time I head to the grocery store with a list to keep me on track. If you look close at the pictures of the ingredients on most of my blog entries, you’ll often see store brand items. I used to clip coupons but I think those extreme-coupon people ruined it for us little folk and it doesn’t seem worth it these days. With the economy rough, I have to cut back when I can.
So when looking for that inexpensive ingredient on which to base a good dinner, I often turn to the simplicity and versatility of dark meat chicken.
Using well-stocked pantry items, I can usually feed the whole family for less than 5 bucks. Catch it on sale and its even cheaper. Not only is it inexpensive, the combinations of flavors are endless.
Want Asian flavors? Use soy sauce and ginger. Game day? Try going “buffalo style.” Want something everyone loves? Add a spice rub and your favorite bbq sauce. Not feeling anything in particular? Keep it simple and refreshing and give this recipe a try.
Ingredients:
- 6-8 pieces chicken (dark meat)
- 3 Tablespoons Soy Sauce
- 2 Tablespoons Honey
- Tablespoon of Olive, Canola, or Vegetable Oil
- Juice of 1 lime
- 1 Clove Garlic, minced
- Cilantro (about 2 tablespoons roughly chopped)
Add all ingredients in a bowl, whisk to combine.
Place chicken in a zip-top bag.
Pour ingredients over chicken and seal, getting as much air out as possible.
Let sit at room temperature 30 minutes (or refrigerate as long as overnight — preferred)
Grill chicken on high heat 2-3 minutes per side.
Lower grill to low heat and continue grilling approximately 25-30 minutes or until internal temperature reaches 180 degrees (or juices run clear).
Meatballs
Everyone has that special recipe that they hold near and dear to their heart. Typically its a family favorite handed down from generation to generation. Something so special that you’ve contemplated putting it in a safety deposit box for fear it may be lost or stolen. But what if that recipe never even existed, even though you thought it should have?
I previously mentioned that my mom was born in Italy. Therefore she certainly had a special meatball recipe, right? How could a woman who cooked as well as she did not bring her version of this tasty concoction with her when she left the old country? The meatball was born there. So was she. What the hell! WHY?????
This is a woman who had hundreds of recipes written on everything from traditional note cards to the back of a napkin, but nary a meatball recipe in the lot. I cringe at the thought that I don’t have a handed down recipe of this Italian born round mound of meat.
But wait, did she even make meatballs? Surely I would remember this. If she made them I probably helped. I helped in the kitchen whenever I could and this would be no exception. But zero memories. Nada. Zip. Zilch.
So maybe the recipe isn’t missing….maybe it never even existed.
Ingredients:
- 1 1/2 pounds Ground Chuck
- 1/4 pound Ground Pork
- 4 slices of soft white bread, crust removed, cubed (soaked in 4 tablespoons of milk, then squeezed to remove excess moisture)
- 2 Eggs
- 1/2 cup of grated romano cheese
- 2 cloves garlic, minced
- 1 small bunch of fresh parsley, chopped
- 1/2 tablespoons salt
- 1/2 tablespoon ground pepper
Preheat oven to 375 degrees.
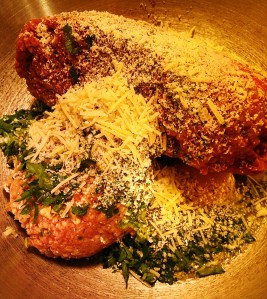
Place all ingredients in a large bowl.
Using your hands, mix all ingredients until well incorporated. Try not to over mix as this may cause the meatballs to get tough.
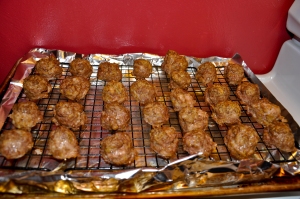
Using a scoop (for uniformity) or your hand, form in to balls (roughly the size just smaller than a golf ball) and place on a wire rack on a sheet pan lined with foil.
Bake on a wire rack in oven for 10-15 minutes until golden brown and no longer pink inside.
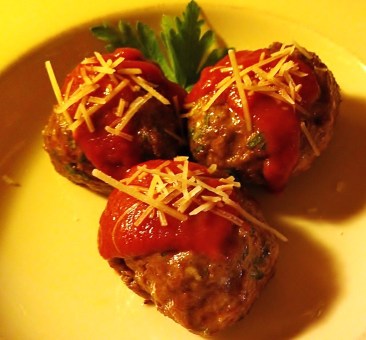
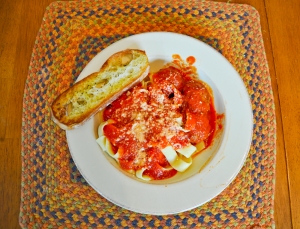
Add as a side dish to (my) pasta or serve as is, topped with sauce (which I’ll blog about soon) and grated cheese.
Basil-Garlic Rubbed Grilled Pork Chops
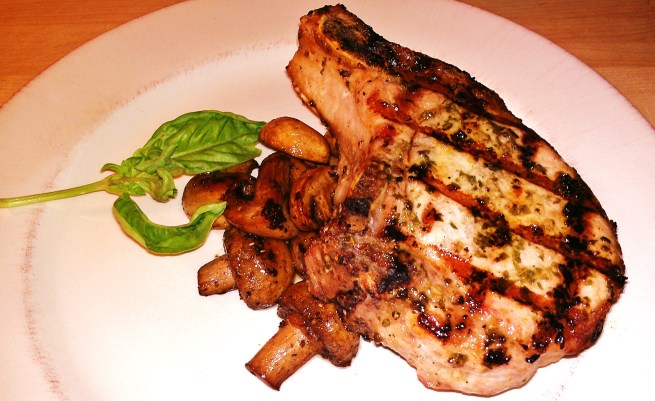
Recently I came across a recipe for grilled pork chops that I couldn’t wait to try. The picture of them looked fantastic and with the simple, fresh ingredients, it sounded like a winning combination.
I made a special trip to the store and dashed to the butcher counter. There I would have the butcher hand pick a few of the best looking, thick, bone-in chops I’d ever buy. I thought he would be annoyed when he would pick one, and I would kindly tell him “sorry, but could I have the one next to it.” Some people don’t do this and settle for pre-packaged shrink wrapped meat, but I say if I’m paying for it, I should get what I want. You should too.
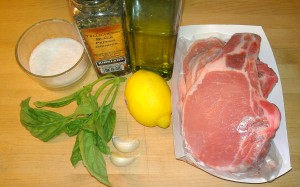
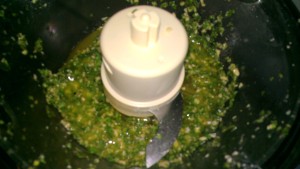
Once home, I assembled the ingredients (minus the pork) and gave them a quick death via the food processor to make a nice green paste. With my silicon pastry brush in hand I was happier than Bob Ross (rest in peace) as I painted my pork chops with the phenomenal smelling mix.
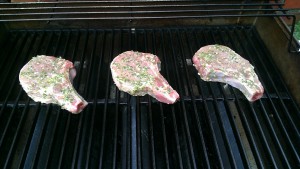
After an hour or so in the fridge, all that was left to do was fire up the grill. I stepped outside, lit the grill and impatiently waited for it to pre-heat. I needed some serious heat to acheive the kind of sear I wanted on these beauties.
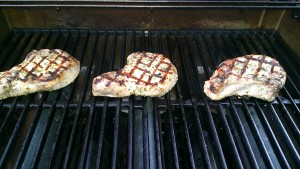
With the heat from the grill at nearly 500 degrees, I gently placed the chops atop the grates. The sound of the meat sizzling as it hit the heat was music to my ears.
Then, out of nowhere the wind picked up and the sky turned to black. The heavens were about to unleash grilling hell upon me.
With the chops sizzling away, there was no turning back. I simply had no choice other than to finish what I started.
But it wasn’t about me. I could care less how wet I got. It was about those glorious hand picked chops. Would I be able to achieve the success I was looking for while darting in and out of the rain (for the record, an umbrella would not have helped here)? I needed to cook for a few minutes, rotate, flip, cook, rotate. Each time I would need to lift the lid, exposing the meat to buckets upon buckets of H2O. Could I pull it off? Would these be the pork chops I had hoped they would be when I first saw the recipe or would they land on my plate as mediocre hunks of the other white meat?
With the chops fully cooked (plus 5 minutes of rest and relaxation) it was time to transfer them to the plate for the tasting. Without hesitation I sliced the first bite and stabbed my creation with the steel tines. Fork to meat..fork to mouth. VICTORY!
OK, so after writing this I realized that I really, REALLY, over-dramatized the situation. Yes it rained and yes it sucked and that was my point. I just hate to grill in the rain. But for these chops, which I think were the best chops I’ve ever tasted, I’d do it all over again.
Ingredients:
- 3 or 4 thick cut bone-in pork chips
- 2 garlic cloves
- 1/2 cup fresh basil leaves
- 2 tablespoons of lemon juice
- 2 tablespoons of extra-virgin olive oil
- 1 teaspoon of kosher salt (or course salt)
- 1/2 teaspoon of fresh ground pepper
While the food processor is running, add the garlic to mince. Stop and add the basil and pulse to chop. Stop. Add lemon juice, olive oil, salt, and pepper and process to make a thin wet paste.
Spread mixture on both side of pork and let stand at least 15 minutes (up to 2 hours in the fridge – which is what I did).
Preheat grill to high.
When grill is hot, place the chops on the grates and grill 4 minutes. Rotate the chops one-quarter and grill 2 additional minutes.
Flip then grill for 3 minutes. Rotate one-quarter and grill an additional 2 minutes.
Remove from grill and let rest 5 minutes (if you can).
ENJOY!
Beer Cheese Burger
When I was a kid it seemed as though every summer weekend my parents were dragging me to a picnic at South Park (a county park in the suburbs of Pittsburgh). There was the bowling league picnic, the church parish picnic, and the corner bar patron picnic. Every picnic seemed exactly like the previous one. The adults were drinking beer and playing horse shoes while the kids were running around trying to figure out which half-empty can of Cherokee Red was theirs. If a kid wasn’t sure, they’d just get a new one.
The food was always the same too. It was a smorgasbord of corn on the cob, hot dogs, and burgers.
Even though I ate my fair share of burgers, there was never anything special about them. The burgers were flat over-cooked discs of meat (in the 70’s it wasn’t safe to eat a burger that was pink in the middle) and the toppings were minimal (american cheese and ketchup or mustard). But I was a kid and this was really all I knew. And I loved them.
Now that I’m grown, my love for burgers has not changed. The burgers I make are fatter and its rare (no pun intended) that I’ll eat one that isn’t somewhat pink. I also like to mix it up when it comes to toppings. My latest venture was the *Beer Cheese Burger.
*Modified from the recipe found in the June 2012 issue of Food Network Magazine
Ingredients:
- 1 1/2 pounds ground chuck
- 1/4 pound of ground pork
- 2 tablespoons butter
- 2 tablespoons flour
- 1/4 teaspoon mustard powder
- 1/4 teaspoon cayenne
- 3/4 cup of beer
- 1/2 cup half and half
- 1 1/2 cups sharp cheddar cheese, grated
- 1/2 tablespoon of grated horseradish
Mix together ground chuck and ground pork. Form to make 4 patties. Grill.

Burgers ready for the grill. (Not pictured: before grilling put an indentation in the middle. This will prevent the burger from “puffing” while cooking)
While the burgers are grilling, melt the butter over medium heat. Stir in the flour, ground mustard, and cayenne to make the roux. Stir about 2 minutes to cook out the flour.
Stir in beer and bring to simmer. Then stir in the half & half and simmer while stirring about 2-3 until thickened.
Stir in the cheese and horseradish until melted.
Pour a few tablespoons over your burger and enjoy! This cheese can also be served with pretzels, over a baked potato, or on a hot dog.
Bacon Jam Burger
Bacon Jam you say? Read on my friends.
Food trucks seem to be all the rage these days. More and more are popping up in cities across American. Unfortunately Pittsburgh seems to be behind the times when it comes to food trucks. We have a few that pop up around town and more seem to be catching on. However, because of some stupid ordnance it makes it very difficult to get one started here, at least in the traditional mobile food truck way. If you’re interested, there is a great article about it here. The Frankutary truck mentioned in the article is actually pretty good. I recently found out that Pittsburgh Taco Truck is on the way soon. I’ll be sure to give them a try once the truck gets rolling.
Anyway, I’m actually very jealous of the cities that have multiple trucks to choose from. My friends in Philly and DC talk about their experiences and I live vicariously though them. When they’re not telling stories, I simply droll while watching the various shows that explore the topic.
One night while watching one of those shows I came across a truck that specializes in a burger topped with what they called “Bacon Jam”. Its basically spreadable bacon. Now that my friends is GENIUS! By the way, if you happen to be in the Seattle area, the truck is the Skillet Street Food truck. Stop by and support your local business. (And let me know how it tastes)
The burger looked and sounded so delicious that I immediately wanted to hop a flight to Seattle to taste one myself. I quickly put the notion out of my head that I wasn’t tasting one of my own anytime soon. That was of course until one day I was perusing our local Sur La Table kitchen store and spied a tiny jar of Skillet Bacon Spread, aka Bacon Jam. Apparently the geniuses from the Skillet Food Truck decided to market their creation. Because of them and their crafty team of merchandise marketers, I could now make one myself. Of course I would have to first plunk down the $9.95 for 10.5 ounces. Don’t have a Sur La Table, the Skillet Street Food website has a list of areas near you that sell it, or for a few bucks more, buy it directly from their site.
The jam is tasty and has a very nice smoky flavor which I love. It makes for a great alternative to your traditional bacon topped burger.
Here is my take on the Skillet Street Food truck Bacon Jam Burger.
Ingredients:
- 1 1/2 tablespoons of Skillet Bacon Spread (Bacon Jam)
- 1 1/2 lbs ground beef
- 1 teaspoon kosher salt
- 1 teaspoon of fresh ground pepper
Mix all ingredients in a large bowl. Form in to patties of the desired size and thickness. Grill over direct heat 4-5 minutes on one side (or until juices begin to form on the top of the burger – or they ‘sweat’). Flip and cook 2-3 minutes. Adjust accordingly based on size of burger and desired level of doneness.
Top with cheese of your choice (I chose Swiss). Once the burger is cooked and cheese melted remove from heat. Add a small smear of bacon jam. Let rest a few minutes to warm the ‘jam’. Add desired toppings before devouring!
Hearty Italian Meats
My step-son Walker was 9 when I met him. Like most 9 year old kids, he was a pretty picky eater. I could count on my fingers the things he would eat. I remember a time when he wouldn’t even want jelly on his peanut butter sandwich. Seriously, a PB & nothing?
When he moved to Pittsburgh I made it my personal mission to get him to try as many foods as possible. Needless to say, this was a challenge. I tried numerous techniques to get him to explore my culinary world, but to no avail. Bribing with cash didn’t work. Neither did a promise of yummy dessert. On the rare occasion where I could get him to try something new, it was often met with the repulsive look of disgust almost instantly after the food hit his tongue. A few times it was even greeted with the “YUCK! This is absolutely the worst thing I ever ate” gag effect. I hadn’t even gotten to the REALLY tough foods yet. You know, like jelly on that sandwich.
As a parent who knew there was life beyond chicken fingers, I never gave up. Slowly but surely we kept trying new foods. A plain taco was a good start. Homemade Mac n’ Cheese soon followed. Eventually he would graduate to more and more foods, even eventually requesting to try something new without me asking.
A few years ago, I introduced him to a wonderful meat platter known as Charcuterie. Pronounced “shar koo tour e”, this fancy word simply refers to meats that have been cured and preserved. Since our Charcuterie plate most always consists of Italian meats, Walker dubbed this meal “Hearty Italian Meats” and has been referred to in our house as such ever since.
Today I’m proud to say, there is isn’t much Walker won’t try. And God forbid if I forget to put jelly on his sandwich.
While your own Hearty Italian Meat plate can have anything you want, here is what typically makes up ours.
Proscuitto di Parma – salt-cured ham. Sliced thin, this almost melts in your mouth. At around $20 per pound, this meat is very expensive, but well worth it and is the “signature” meat on any plate.
Sopressata – This is hard cured sausage made of pork, spiced with pepper in a thin casing, similar to salami.
Bresola – an air-dried, salted beef, typically top-round, with no casing. Again, not a cheap meat, but a little goes a long way.
No plate is complete without some cheese, crusty bread, and briny olives. The plate pictured above has fresh mozzarella, fresh ricotta, and an assortment of olives.
Most high-end markets, or if your city has them, more specialized stores, carry these and other meats. Here in Pittsburgh, I typically buy at Penn Mac in the Strip, Uncommon Market near South Hills Village, or Giant Eagle Market Districts.


