Archive
Sausage Gravy and Biscuits
Bacon is everywhere. Bacon candy, bacon cupcakes, bacon beer…the list goes on. But what about the other porky breakfast meat? When does sausage start showing up with regularity on Pinterest?
I’m here to help out by blogging about my favorite way to prepare sausage. Sausage gravy and biscuits.
I must state, if you’re looking for something low in calories, I suggest you stop reading now. This ain’t it. This my friends is full fat on fat, topped pretty much with more fat.
But where there is fat there is flavor. These have lots of flavor.
Luckily these are filling so one portion should do it.
With just a few simple ingredients, it’s a cinch to put together also.
This presentation is nice when having friends over for breakfast/brunch, but feel free to crumble the cooked sausage and toss it right in with the gravy. No rules here.
For best flavors, make the sausage mix the night before and cook the following morning. Enjoy!
Ingredients:
|
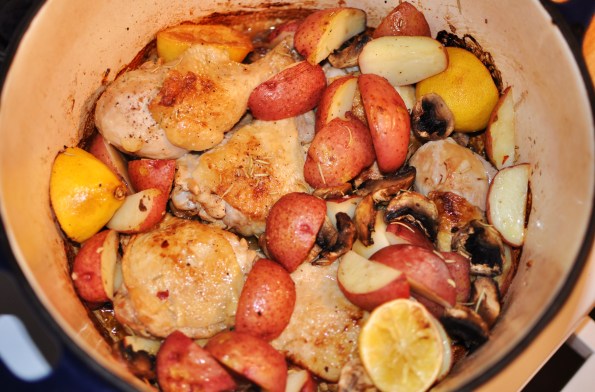
Lemon and Rosemary Chicken
Today I had a great conversation with a co-worker and good friend. We talked about a bunch of things and he gave me some pretty solid advice. While most of the conversation was serious, we eventually circled back to food and beer. We got on the topic of my blog which he and his wife really like. While I mainly do it for myself, I have to admit it’s really nice to know that people not named Dennis actually read it.
During our talk, he gave me some cool compliments and asked, “How long does it take to write a blog entry?” While I gave him the answer it did give me the idea to do a quick Q&A blog entry.
Here’s a few (and a recipe too).
Q: How long does it take to write a blog entry?
A: Typically I write most entries in less than an hour. Actually, I write it in less time than that but I always go through a series of revisions, mainly for typos, sometimes for content, to get it to my liking, but I don’t think its ever been longer than an hour.
Q: What was my favorite blog entry to write?
A: My favorite so far is the “Basil-Garlic Rubbed Grilled Pork Chops.” I write this blog for fun, and had a lot of fun writing that story in particular. To me, it was the essence of what I want my blog to be. A fun, creative way to tell a story about the meal I’m preparing. That entry had all the elements that made me want to continue writing.
Q: What was the hardest blog entry to write?
A: The LOST Supper blog was difficult. Mainly because I felt like I was writing a restaurant review. I didn’t want it to come off as such so I played around with a couple of different versions before I settled on the one that I ultimately published.
Q: What recipe was I most eager to share?
A: Tie between Shooter’s BBQ Sauce and Shooter’s Secret Spice Dry Rub. Mainly because they’re tried and true and 100% all mine. Additionally, anyone that has tried it has liked it (or they lie really well).
Q: What future recipe am I most eager to share?
A: Beer Braised Ribs. It’s just a delicious recipe. Good comfort food. A hearty Fall or Winter warmer. And most of all, easy to make (psst go buy a dutch oven).
In the meantime, here is another recipe that makes use of my dutch oven. The original recipe which I adapted from Food Network, says to use a cast iron skillet and that will certainly work, but I don’t have one large enough to accommodate everything in this recipe so I improvised. I also used dried rosemary instead of fresh and thighs/legs instead of bone-in breasts. I simply think dark meat stands up better to the high heat. Enjoy!
Ingredients:
|
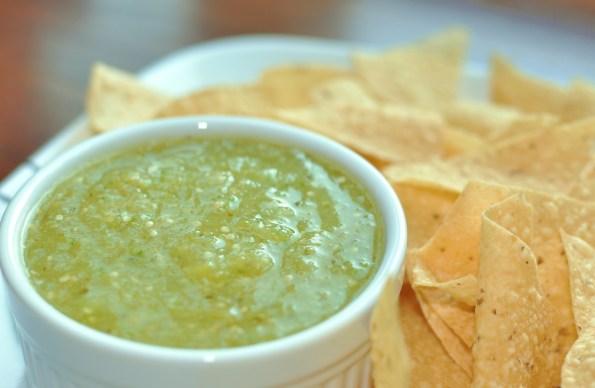
Salsa Verde
I love chips and salsa.
Give me the salty crispness of tortilla chips and a nice bowl of spicy (but not burn my mouth hot) salsa and I’m nearly good to go. Just need to throw in an icy cold beer, the remote control, and a sporting event to make it complete. A couch potato’s dream!
Recently my love affair with green salsa has taken center stage and I feel like its the only color salsa I’ve been eating as of late.
Even though I’ve made home made tomato based salsa many times, admittedly, I’ve always bought the green version pre-made.
Although I’m not sure why, I think I may have initially been intimated by a tomatillo, the vegeta…errrr…I mean berry, needed to make salsa verde.
I feel as though I must give a quick reminder that tomatoes, whether red, yellow, striped or green are all berries. I won’t go in to the details, I trust that those with Botany degrees know what they’re talking about. (Ok, one more tid-bit — strawberries are not berries — weird right?)
Anyway, back to the tomatillo. You can find them in the vegetable section of your grocery store. You may have to go to a larger grocery store though as not every store I’ve been to carries them. (I get mine from the local Mexican grocer). They come with a paper husk on them which you will need to peel when you get home. Once peeled they’re quite sticky so they need a good rinse. Also, they are $3 or $4 a a pound, but don’t be alarmed, they don’t weigh a ton and you don’t need a lot to make a batch of salsa verde.
Once made, you can store it in an airtight container, refrigerated, for roughly 2 weeks (if it lasts that long)
By the way, if you’re going to make good homemade salsa, try to pair it with homemade chips.
To make your own, just buy a pack of corn (not flour) tortillas, cut in to triangles and deep fry in 350 degree oil just long enough to make golden brown. Remove from oil, let drain on a rack over a newspaper lined sheet pan. Season with salt while hot. Thank me later.
I’ll mention I don’t always want to go through the deep fry trouble, so instead I make sure to use good quality tortilla chips. They cost a bit more but are worth it. Xochitl is my favorite. Enjoy!
Ingredients:
|
Chicken Piccata
Ahhh, the chicken breast. I have such a love-hate relationship with you!
Let’s talk pro’s and con’s of the chicken breast.
Pros:
They’re extremely healthy when the skin is removed.
They’re readily available and I usually always have them on hand.
While more expensive than a chicken’s darker body parts, they’re a lot cheaper than other meats.
There are so many different ways to prepare it (versatility is a cook’s friend).
Cons:
The skin is full of fat and calories.
They need lots of jazzing up otherwise they’re plain, boring, and tasteless.
Overcook the white meant and its more dry than the Arizona Desert. But if you under cook it, bad things happen.
Damn you chicken breast!!
All kidding aside, the chicken breast really can be a cook’s best friend. Just find a decent way to keep it healthy while keeping it moist at the same time and your family (and your waistline) will love you for it.
This chicken dish is light, refreshing, and super moist you don’t even need a knife to cut it.
Go easy on the egg and flour and it can be pretty healthy too as each breast comes in at just under 300 calories.
What’s even better is that it is quick to make — easily under 30 minutes — and its cooked in one pan, so clean up is even easier.
Enjoy!
Ingredients:
|
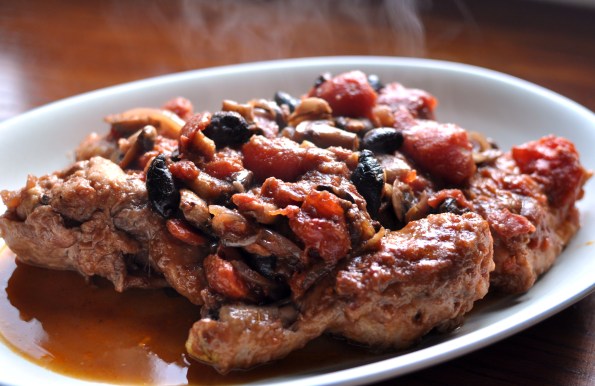
Chicken Cacciatore
It’s another cool, crisp September day. I’m beginning to wonder if Summer is behind us and Autumn is here to stay.
If so, that makes me happy. Its my favorite season.
Something else that would be happy is my Dutch Oven which often gets neglected in the Summer.
Well trusty, heavy-bottomed (I mean that in a nice way) cookware, fear no more, Autumn is your time to shine.
With it’s versatility and ability to retain heat the Dutch Oven is the perfect vessel to cook most anything. Sauces, soups, stews, chili, and even bread (all you Pinterest junkies know the bread I’m talking about) all get the Dutch workout.
They’re especially good for recipes that require a braise.
One such recipe is Chicken Cacciatore. (Here’s your Italian lesson – Hunter’s Chicken)
This is another one of those Mom-inspired dishes that is easy. But like most things she made, the recipe card wasn’t included. So in order for me to recreate it as close as possible, and with my Mom no longer with us, I needed to find a good Italian to show me the way.
Giada De Laurentiis? Love her but despite her ability to over-enunciate any Italian word with drama and flair, she’s not Italian enough for me.
Guy Fieri? The name is Italian but that’s about it.
Lidia Bastianich? She has a successful Italian restaurant here in Pittsburgh, but she’s actually Croatian. Who knew?
Surely somewhere on the information super-highway (people still call it that right) there has to be someone to teach me the way.
That person, and my new favorite chef because of the ease of his recipes is Fabio Viviani. He reminds me of the way my mom used to cook. Nothing fancy or over the top – just simple, delicious home cooked dishes.
He was a contestant on Bravo’s “Top Chef”. However, if you’ve never watched (like me) you can see Fabio cook on his web series for Yahoo called Chow Ciao. It’s humorous, without being obnoxious and really down to Earth. Highly recommended. New episodes premiere every Monday.
I followed Fabio’s Chicken Cacciatore recipe pretty closely but made some adjustments to how long I cooked it to guarantee the chicken was fork tender.
Here is his recipe (with my slight modifications). Enjoy!
Ingredients:
|
Pasta e Fagioli
When I stepped outside this morning I was greeted by a bit of rain, a strong breeze, and much cooler temperatures than we’ve had around here lately.
Not to mention kids are back in school, college football is in its second weekend and pro football has kicked off as well.
Must be Fall (or at least all signs are starting to point that its right around the corner).
For me, Fall means really digging in to some classic comfort foods meant to warm you up. Hearty soups, chili and stews come to mind.
One of my all-time favorite soups is an Italian soup with pasta and beans, Pasta e Fagiloi.
This is a soup my mom made time and time again. With her broken English I never really knew what she was saying. I thought it was Pasta Fa-Jew (no offense to my Jewish followers). For years, that’s what I called it. Doesn’t matter how its pronounced, I just knew it was good soup.
Simple ingredients, easy to make, and extremely satisfying. Be sure to serve it with a nice piece of crusty bread to sop up any soup you can’t get with the spoon.
Enjoy!
Ingredients:
NOTE: I actually add the amount of pasta I want to my bowl, then ladle soup over the pasta. Doing so controls the amount of pasta to soup ratio AND the pasta doesn’t suck up all of the broth |
Marinara Sauce
My very first blog entry was homemade pasta where I promised I would have a future entry dedicated to the sauce I use with it. Nothing.
Then a few weeks later I made the meatball entry, where again, I made promise to blog my sauce recipe. Still nothing.
I did pizza entries (both on the grill and my deep dish) both of which need sauce, but yet, no sauce recipe. (Yikes)
I think the last straw for me to get off my butt and actually write about it came recently when a couple of friends of mine asked “When do I get the sauce recipe?”
Guess I better get to it.
Oh, but before I do, let me mention that a good marinara sauce is one of the simplest things you can make. It tastes better than jarred sauce (and its better for you). It’s cheaper than jarred sauce (stock up when canned tomatoes are on sale). And best of all, it is just as quick to make as sauce from a jar. Not to mention, other than the tomatoes, most everyone has all the ingredients in their pantry.
Take that convenience argument!
(If you don’t have garlic, salt, pepper, olive oil in your pantry, shame on you – quit reading and run out and buy these staples and keep them on hand – don’t forget the tomatoes)
Finally you might be thinking why canned when there is an abundance of tomatoes in season right now? Personally, I think they taste better for *sauce. (*I like fresh tomatoes for things like salsa)
Ingredients:
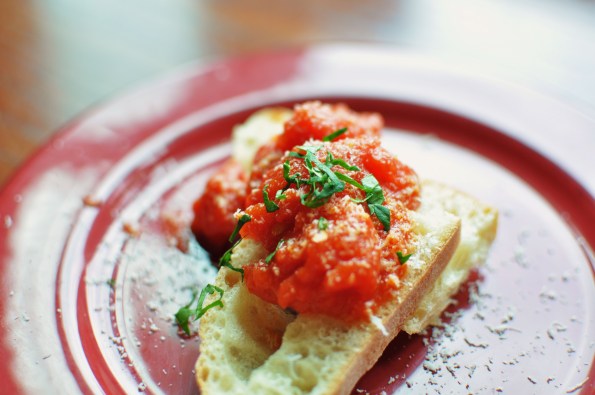
Use sauce for pizza, pasta, meatballs, sausages…..or as is served over a nice piece of crusty bread topped with grated Parmesan. |
