Archive
Gnocchi with Mascarpone and Lemon
For those in the United States (sans Arizona and Hawaii), today marks the end of Daylight Savings Time.
In the days leading up to today, we’re often reminded to turn back the clock and “enjoy that extra hour of sleep.”
Now I don’t know about you, but I don’t feel like I get anything extra. As a matter of fact, I feel like I’m losing out in the deal.
My body decided that (new) 5:30 was a good time to be awake and as a result, I’ll be ready to be in bed by (new) 8:30. If this holds true, I won’t even be awake to hear the jazz music during “Homeland’s” opening credits. Sad!
Because of the time change, my stomach wants to eat all meals at its “normal” time so I find myself unnecessarily snacking while I await the real mealtime. Fun-sized Kit-Kat anyone?
I get that it may light when I arrive at work tomorrow, but what good does that do me when I have to drive home in the dark?
I understand the reasoning behind it and I’m all for helping our farmers, but somehow the rest of the world seems to manage without changing clocks.
Point being, I’m not getting anything extra here and you’re not either.
So I say, as a nation, lets rally around getting rid of Daylight Savings Time. If not, I suppose I could move to Hawaii. Now that would be something extra!
Since you received that extra hour of sleep today, why not take advantage of that energy and make this delicious Gnocchi recipe courtesy of Giada De Laurentiis. Enjoy!!
Ingredients:
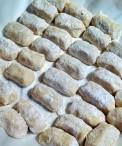
Your uncooked gnocchi should look similar to this: To freeze: Place entire sheet pan in freeze for approximately 30 minutes. When gnocchi have hardened, transfer to freezer bag and freeze for up to 3 months. To cook immediately: Bring a large pot of water to a boil. In batches of 6 to 8 pieces of gnocchi, carefully drop in to boiling water. The gnocchi will float to the surface when they are done (typically 3-4 minutes). Carefully remove with a slotted spoon and serve with your favorite sauce.
|
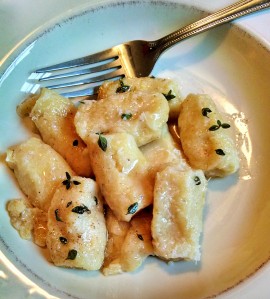
The sauce used for the pictured gnocchi is a brown butter and thyme. To make this sauce, simply melt a stick of butter with a teaspoon of salt in a skillet until it begins to brown. Remove from heat and stir in tablespoon of fresh thyme leaves. Pour over cooked gnocchi.
Chicken Cacciatore
It’s another cool, crisp September day. I’m beginning to wonder if Summer is behind us and Autumn is here to stay.
If so, that makes me happy. Its my favorite season.
Something else that would be happy is my Dutch Oven which often gets neglected in the Summer.
Well trusty, heavy-bottomed (I mean that in a nice way) cookware, fear no more, Autumn is your time to shine.
With it’s versatility and ability to retain heat the Dutch Oven is the perfect vessel to cook most anything. Sauces, soups, stews, chili, and even bread (all you Pinterest junkies know the bread I’m talking about) all get the Dutch workout.
They’re especially good for recipes that require a braise.
One such recipe is Chicken Cacciatore. (Here’s your Italian lesson – Hunter’s Chicken)
This is another one of those Mom-inspired dishes that is easy. But like most things she made, the recipe card wasn’t included. So in order for me to recreate it as close as possible, and with my Mom no longer with us, I needed to find a good Italian to show me the way.
Giada De Laurentiis? Love her but despite her ability to over-enunciate any Italian word with drama and flair, she’s not Italian enough for me.
Guy Fieri? The name is Italian but that’s about it.
Lidia Bastianich? She has a successful Italian restaurant here in Pittsburgh, but she’s actually Croatian. Who knew?
Surely somewhere on the information super-highway (people still call it that right) there has to be someone to teach me the way.
That person, and my new favorite chef because of the ease of his recipes is Fabio Viviani. He reminds me of the way my mom used to cook. Nothing fancy or over the top – just simple, delicious home cooked dishes.
He was a contestant on Bravo’s “Top Chef”. However, if you’ve never watched (like me) you can see Fabio cook on his web series for Yahoo called Chow Ciao. It’s humorous, without being obnoxious and really down to Earth. Highly recommended. New episodes premiere every Monday.
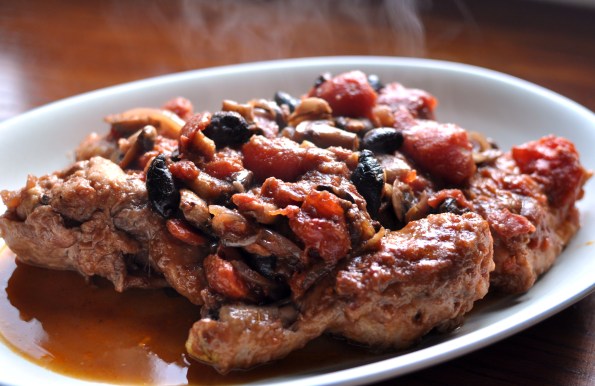
I followed Fabio’s Chicken Cacciatore recipe pretty closely but made some adjustments to how long I cooked it to guarantee the chicken was fork tender.
Here is his recipe (with my slight modifications). Enjoy!
Ingredients:
|
Pasta e Fagioli
When I stepped outside this morning I was greeted by a bit of rain, a strong breeze, and much cooler temperatures than we’ve had around here lately.
Not to mention kids are back in school, college football is in its second weekend and pro football has kicked off as well.
Must be Fall (or at least all signs are starting to point that its right around the corner).
For me, Fall means really digging in to some classic comfort foods meant to warm you up. Hearty soups, chili and stews come to mind.
One of my all-time favorite soups is an Italian soup with pasta and beans, Pasta e Fagiloi.
This is a soup my mom made time and time again. With her broken English I never really knew what she was saying. I thought it was Pasta Fa-Jew (no offense to my Jewish followers). For years, that’s what I called it. Doesn’t matter how its pronounced, I just knew it was good soup.
Simple ingredients, easy to make, and extremely satisfying. Be sure to serve it with a nice piece of crusty bread to sop up any soup you can’t get with the spoon.
Enjoy!
Ingredients:
NOTE: I actually add the amount of pasta I want to my bowl, then ladle soup over the pasta. Doing so controls the amount of pasta to soup ratio AND the pasta doesn’t suck up all of the broth |
Marinara Sauce
My very first blog entry was homemade pasta where I promised I would have a future entry dedicated to the sauce I use with it. Nothing.
Then a few weeks later I made the meatball entry, where again, I made promise to blog my sauce recipe. Still nothing.
I did pizza entries (both on the grill and my deep dish) both of which need sauce, but yet, no sauce recipe. (Yikes)
I think the last straw for me to get off my butt and actually write about it came recently when a couple of friends of mine asked “When do I get the sauce recipe?”
Guess I better get to it.
Oh, but before I do, let me mention that a good marinara sauce is one of the simplest things you can make. It tastes better than jarred sauce (and its better for you). It’s cheaper than jarred sauce (stock up when canned tomatoes are on sale). And best of all, it is just as quick to make as sauce from a jar. Not to mention, other than the tomatoes, most everyone has all the ingredients in their pantry.
Take that convenience argument!
(If you don’t have garlic, salt, pepper, olive oil in your pantry, shame on you – quit reading and run out and buy these staples and keep them on hand – don’t forget the tomatoes)
Finally you might be thinking why canned when there is an abundance of tomatoes in season right now? Personally, I think they taste better for *sauce. (*I like fresh tomatoes for things like salsa)
Ingredients:
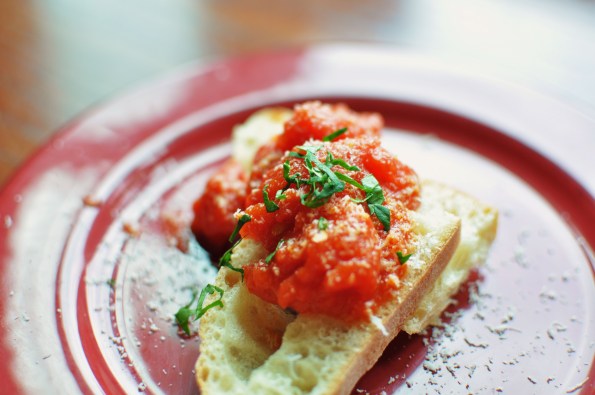
Use sauce for pizza, pasta, meatballs, sausages…..or as is served over a nice piece of crusty bread topped with grated Parmesan. |
Penne alla Vodka
Let me begin by stating this blog entry was very close to not ever being written.
Why you ask? Well because the dish was almost ruined, along with my house during the process.
The recipe, which I’ll get to shortly, requires that you flambe’ part of it. For those not familiar, it is the cooking process where you essentially set your food on fire with alcohol.
Food and Fire – I’m in!
Since I’m a pretty decent cook AND I’ve seen the flambe’ process up close and personal at fancy restaurants where I ordered Banana’s Foster, I assumed I could do it without issue.
I’ll go on record and state…I can do it. You can do it too. Because setting food on fire IS easy. But not done properly IT IS DANGEROUS. Extremely dangerous. Dealing with the 3 foot high flame that ignites from this process will also scare crap out of you.
Now I’ve been known to exaggerate before (see my thunderstorm story here), but the height of the flame is no exaggeration. And once the flame was ignited, there was no turning back.
I really didn’t know what to do other than move it away from anything that would catch on fire and as low from the ceiling as possible. And since I’m over six-feet tall, I needed to crouch a bit as I waited for the alcohol to burn. Not an easy task.
With no way for me to put out the flame I needed to keep it out of harms way long enough to avoid a call to the insurance company.
The 60 second process seemed like an eternity and every time the flame got lower it grew again when I would move back towards the stove. So I waited with the hot pan of fire in my hand until it was gone.
With the flame gone and my eyebrows still intact, I moved the pan back to the stove, wiped the moistness from my face (and perhaps changed my skivvies) and proceeded to make one kick-ass pasta dish.
So now I that I lived to tell my story, I did some research on how to properly do this technique. Seems like I did it just fine, but my kitchen is too small and I should have avoided trying altogether. I also found out afterwards that while flambe’ is the best way to infuse your dish with the vodka, you could do it without this process.
I sure wish I had known that ahead of time….but then I wouldn’t have had this great safety lesson to share.
If you want to try flambe’ go for it, just make sure you have a fire extinguisher handy.
For those not as adventurous (read:stupid), here is the flambe’ free version. Enjoy!
Ingredients:
|
Lower-Cal Alfredo
Years ago I went to a restaurant and and was looking over the menu. Unsure of what I wanted, I focused in on the Fettuccine Alfredo.
Pasta. Cream. Butter. Parmesan. Sounded good to me.
The dish came, and it looked heavenly. The pasta smelled wonderful and tasted equally as good.
The portion was decent but wasn’t huge, so I tackled the whole plate.
About an hour later things weren’t so good. I felt like I ate a bag of cement. It just sat there, filling my gut. I was miserable.
A few days later I came across an article entitled “Worst Foods to Order When Dining Out”. What do you think topped the list? The article stated that Fettuccine Alfredo has more saturated fat than a whole pint of Ben and Jerry’s Chubby Hubby. YIKES!
After reading the article, this chubby hubby vowed never again to eat the gut-busting, artery clogging dish.
That is, of course, until one morning I was watching (yep, you guessed it) Food Network. The show was “Healthy Appetite” with Ellie Krieger. She made a version of Low-cal Fettuccine Alfredo that, if it tasted as good as it looked, would get me back in the Alfredo eating game. One-third the calories and fat, I couldn’t wait to give it a try.
Thank you over-priced cable television.
I modified her recipe slightly by adding more cream cheese and less Parmesan and omitting parsley in the dish.
Ingredients:
- 1 Tablespoon unsalted butter
- 1 Clove garlic, minced
- 1 Teaspoon grated lemon zest
- 2 Teaspoons all-purpose flour
- 1 Cup 2% milk
- Kosher Salt and Pepper to taste
- 4 Ounces low-fat cream cheese (1/2 block)
- 1/2 Cup Parmesan cheese
- 1 Box spaghetti noodles (or any noodle you prefer – or even homemade)
Cook pasta according to directions.
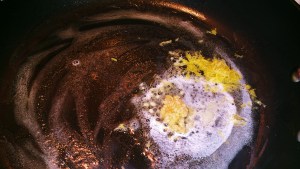
Meanwhile, over medium heat melt the butter. Add the garlic and lemon zest and cook for about 1 minute.
Stir in the flour to make a roux. Stir for about 1 minute.
Whisk in the milk, salt, pepper and cook, stirring constantly….
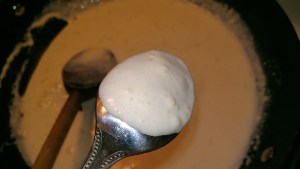
….until the liquid coats the back of a spoon, about 3 minutes.
Add in the cream cheese and Parmesan and stir until melted. Lower heat.
Drain pasta, reserving about 1 cup of the pasta water.
Add pasta, along with half-cup of the pasta water to the cheese sauce and gently toss to combine. If the mix appears too thick, add more pasta water at little at a time.
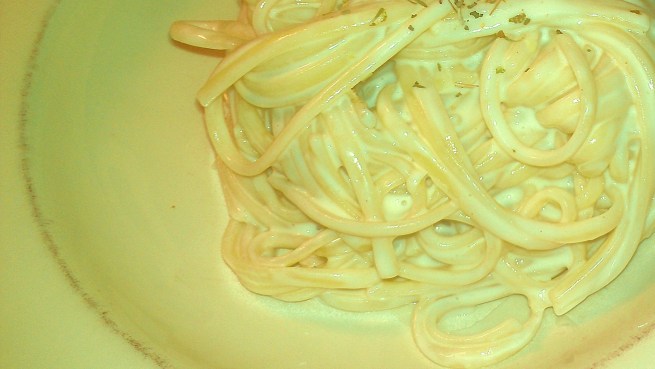
Add to serving plate and top with another small sprinkle of Parmesan and top with parsley, oregano, or a combination of Italian spices. Enjoy!
Pierogi’s (or perogi, pierogy, perogy, pierógi, pyrohy, pirogi, or pyrogy)

Homemade Pierogi’s
Before I started to type this entry, I realized that sometimes I just don’t know the exact measurements that I need for certain recipes. But the beauty of cooking is you don’t really need exact. Its not baking, its cooking and sometimes you have to improvise. That’s what makes it fun for me. All ingredients listed below are a starting point, but you may to adjust based on how wet or dry the ingredients are. My apologies in advance if you don’t get it right the first time….but keep trying. Trust me, mistakes in the kitchen happen and the only way to get better is to not give up.
So, not familiar with Pierogi’s?
A pierogi (spelled various ways) is Polish for “dumpling of unleavened dough” (or at least that’s what Wikipedia says they are) usually filled with something savory (but can be made sweet). Before my mom passed, she probably made thousands of them. She made them for family. She made them for friends. Heck, I’m convinced she made them for people she didn’t even know. And they were GOOD. Really, really good! They are comfort food for me and I describe a pierogi as a pillow of edible goodness. Make them from scratch its like a pillowcase with a thousand thread count.
The first time I ever made them without Lucille at the helm was last year. I was talking food with my buddy Sal and the subject came up. I told him I wanted to give it a shot. Not having my mom’s recipe, I asked him to get a hold of the recipe that his mother-in-law used. While the recipe below isn’t her’s exactly (I lost that one), I think it’ s very similar (and most pierogi recipe you find on the internet uses all of the same basic ingredients anyway).
Give it a try, they’re easy and can be filled with anything you can think of. I’m working on a blue cheese, mushroom, bacon burger pierogi, that I’ll finish on the grill for a nice presentation.
Ingredients:
1 egg (lightly beaten)
2 cups of flour (plus extra based on humidity, plus even more for kneading and rolling)
1/2 teaspoon of kosher salt (table salt will work, but try to use kosher)
1/2 cup of sour cream (don’t use fat free, but you could use light)
1/4 cup of softened unsalted butter (half of a stick) cut in to pieces
4 tablespoons of ice water (if necessary)
Plus ingredients to fill your pierogi’s (garlic mashed potatoes and cheese is popular – recipe follows)
In a large bowl, mix the flour with the salt, then pour in the beaten egg and mix gently with a wooden spoon or spatula. Add the sour cream and butter and work the dough until it isn’t sticky (adding more flour if too wet or some of the ice water if too dry). Be very careful not to over mix). The finished dough shouldn’t be tacky but shouldn’t have too much flour either.
Once mixed, take the dough and wrap it in plastic wrap and refrigerate for about 30 minutes (or until your ready to use, even overnight). Your dough ball should look something like this:
After 30 minutes, or when you’re ready, flour your work surface then unwrap the dough and cut in half (I find it easier to work in 2 smaller batches). Wrap one half and place back in the fridge, put the other half on the work surface. With a rolling pin, begin to roll the dough until desired thickness (about 1/16″)
*Notice how similar this is to making pasta — almost all of the same ingredients too.
Once the dough is rolled, you’ll want to cut it in to rounds (the size of a doughnut works best). If you have a doughnut cutter, use it (don’t forget to remove the doughnut hole part). I don’t have one so I use what my mom would sometimes use…the screw top of a mason jar (or a cup or glass works good too). You should get about a bakers dozen of rounds when cut. Take the unused dough and pack it together, roll that out and make another 4 or 5 rounds. Place all of your rounds to the side (I put them on a cookie sheet out of the way)
Once you have your rounds cut, you can start to fill them. I use a small scoop to get roughly same amount in each pierogi. Place the filling in the center.
Once your rounds are filled, you’re ready to fold. Take the top half and fold it over to the bottom half. They should stick together but if not use a very small amount on your finger to help make a seal. (I keep a bowl of water near by and dip my finger in if needed). Once folder over, crimp with a fork. I got 18 with one half of the dough.
Repeat with the other half of the dough and remaining mixture.
At this point, the pierogi’s are ready to be cooked.
To cook, bring a pot of water to a boil, then add salt. Drop the pierogi’s in the salted boiling water until they float (just a few minutes or longer if frozen. Meanwhile, slice onions and begin to saute’ in a separate pan with melted butter.
When pierogi’s are done boiling, remove them with a slotted spoon (drained thoroughly) and place them in the pan with the butter and onions. Cook on both sides to desired crispiness. Serve with a dollop of sour cream.
However, if you are not ready to cook immediately, pierogi’s freeze very well.
To freeze, place the uncooked pierogi’s in a single layer on a baking sheet and pop the whole thing (uncovered) in to the freezer. Freezing them this helps to ensure they don’t stick when you package them.
After about 30 minutes, take 6 pierogi’s (or a lesser portion size you like for future use) and put them in a sandwich bag. Then take the filled sandwich bags and put those in a freezer bag and freeze for 2-3 months.
Garlic & Cheddar Mashed Potatoes Pierogi Filling (or just to eat as a side dish)
Ingredients:
4-6 russet potatoes (skin peeled)
1 or 2 cloves of garlic
4-6 oz. of shredded cheddar
1/2 cup of warm milk
2-3 tablespoons of unsalted butter
Salt and Pepper to taste
Cut potatoes in to same sized chunks, place in pot and cover with cold water. Cook until fork tender. Meanwhile, mince the garlic and shred the cheese. When potatoes are cooked, drain complete. Add in a large bowl with the garlic, butter, salt and pepper. Add a little milk and begin to mash until desired consistancy (adding more milk as needed). When mashed, mix in cheese and let cool complete.
Pasta From Scratch
Since my mom (don’t be confused if I make reference to her as Lucille from time to time) is my food inspiration, I’ve decided that my first blog post would be dedicated to her.
Lucille was born in a small city outside of Naples, Italy. She met my dad, who was serving in the US Navy while he was on shore leave back in the 60’s. Navy sailor in port meets a local lady, 9 months later my older brother was born. Now, this doesn’t make my mom a bad person, hey shit happens, but it is the basis of my roots, so I thought it was worth mentioning.
I’d venture to guess that since she didn’t know English during her early days in the U.S., she shared her ideas through food, building on her own knowledge of cooking and passing it on to family and neighbors. She cooked a LOT. Italian food, Polish Food, American classics and tons of baked goods. Sans liver and onions, there was nothing she made that I wouldn’t eat.
Eventually she would turn her love of cooking in to a full time job and became the head cook for the local chapter of “Meals on Wheels” cooking for the elderly. While I never bothered to ask, I imagine one of the first things she made when she took over the program was something from her heritage. Lucille died a year ago but I hope through this blog, her love of all things food will live on.
Ingredients:
2 Eggs (lightly beaten)
2 Cups All Purpose Flour
2 Teaspoons Kosher Salt
4 Tablespoons Tap Water
Make a well with 2 cups of flour and pour in 2 slightly beaten eggs, 4 tablespoons of water and 2 teaspoons of salt. Slowly incorporate the egg in to the flour with a fork. When is just about mixed, get your hands dirty to knead the dough.
the kneaded egg/flour mixture will look something like this. Cut this in half to work with a smaller portion for easier rolling. Of course if you have a pasta roller, you don’t need my tips.
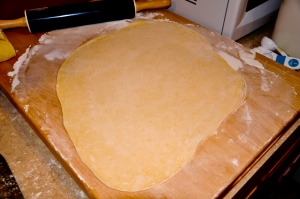
With a rolling pin (my mom didn’t have a pasta maker) roll the dough until it is pretty thin (thicker if you’re making noodles for chicken noodle soup). The dough should look like this when its thin enough. To test if its thin enough, bring the dough to the end of your work surface. Blow as hard as you can under it…if the dough flutters, its thin enough.
Dust lightly with flour and roll the dough in to a “jelly roll”
Using a sharp knife, cut the roll in to the thickness you want. This size is roughly larger than linguine but thinner than pappardelle
Unroll your strips and let dry for an hour or two (a pasta drying rack is recommended but I don’t have one so this worked)
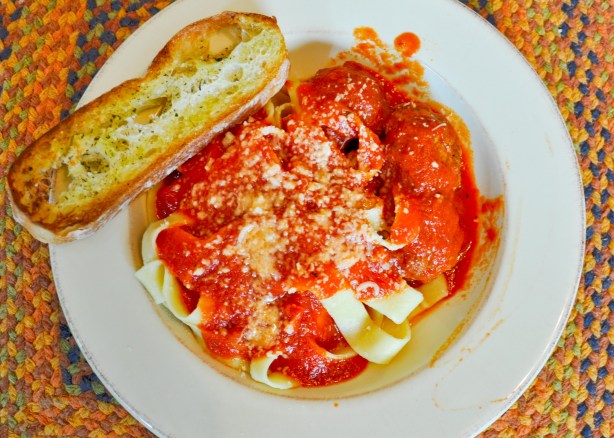
Bring water to a rapid boil, salt water generously and boil for 2 to 3 minutes. Drain. Add your favorite sauce (I’ll have a future blog post that dives in to meatballs and sauce) top with some cheese and serve.

