Archive
Gnocchi with Mascarpone and Lemon
For those in the United States (sans Arizona and Hawaii), today marks the end of Daylight Savings Time.
In the days leading up to today, we’re often reminded to turn back the clock and “enjoy that extra hour of sleep.”
Now I don’t know about you, but I don’t feel like I get anything extra. As a matter of fact, I feel like I’m losing out in the deal.
My body decided that (new) 5:30 was a good time to be awake and as a result, I’ll be ready to be in bed by (new) 8:30. If this holds true, I won’t even be awake to hear the jazz music during “Homeland’s” opening credits. Sad!
Because of the time change, my stomach wants to eat all meals at its “normal” time so I find myself unnecessarily snacking while I await the real mealtime. Fun-sized Kit-Kat anyone?
I get that it may light when I arrive at work tomorrow, but what good does that do me when I have to drive home in the dark?
I understand the reasoning behind it and I’m all for helping our farmers, but somehow the rest of the world seems to manage without changing clocks.
Point being, I’m not getting anything extra here and you’re not either.
So I say, as a nation, lets rally around getting rid of Daylight Savings Time. If not, I suppose I could move to Hawaii. Now that would be something extra!
Since you received that extra hour of sleep today, why not take advantage of that energy and make this delicious Gnocchi recipe courtesy of Giada De Laurentiis. Enjoy!!
Ingredients:
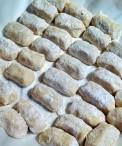
Your uncooked gnocchi should look similar to this: To freeze: Place entire sheet pan in freeze for approximately 30 minutes. When gnocchi have hardened, transfer to freezer bag and freeze for up to 3 months. To cook immediately: Bring a large pot of water to a boil. In batches of 6 to 8 pieces of gnocchi, carefully drop in to boiling water. The gnocchi will float to the surface when they are done (typically 3-4 minutes). Carefully remove with a slotted spoon and serve with your favorite sauce.
|
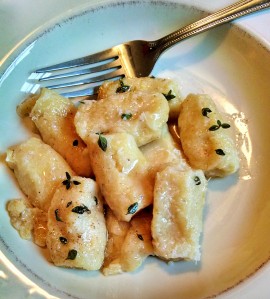
The sauce used for the pictured gnocchi is a brown butter and thyme. To make this sauce, simply melt a stick of butter with a teaspoon of salt in a skillet until it begins to brown. Remove from heat and stir in tablespoon of fresh thyme leaves. Pour over cooked gnocchi.
Lemon and Rosemary Chicken
Today I had a great conversation with a co-worker and good friend. We talked about a bunch of things and he gave me some pretty solid advice. While most of the conversation was serious, we eventually circled back to food and beer. We got on the topic of my blog which he and his wife really like. While I mainly do it for myself, I have to admit it’s really nice to know that people not named Dennis actually read it.
During our talk, he gave me some cool compliments and asked, “How long does it take to write a blog entry?” While I gave him the answer it did give me the idea to do a quick Q&A blog entry.
Here’s a few (and a recipe too).
Q: How long does it take to write a blog entry?
A: Typically I write most entries in less than an hour. Actually, I write it in less time than that but I always go through a series of revisions, mainly for typos, sometimes for content, to get it to my liking, but I don’t think its ever been longer than an hour.
Q: What was my favorite blog entry to write?
A: My favorite so far is the “Basil-Garlic Rubbed Grilled Pork Chops.” I write this blog for fun, and had a lot of fun writing that story in particular. To me, it was the essence of what I want my blog to be. A fun, creative way to tell a story about the meal I’m preparing. That entry had all the elements that made me want to continue writing.
Q: What was the hardest blog entry to write?
A: The LOST Supper blog was difficult. Mainly because I felt like I was writing a restaurant review. I didn’t want it to come off as such so I played around with a couple of different versions before I settled on the one that I ultimately published.
Q: What recipe was I most eager to share?
A: Tie between Shooter’s BBQ Sauce and Shooter’s Secret Spice Dry Rub. Mainly because they’re tried and true and 100% all mine. Additionally, anyone that has tried it has liked it (or they lie really well).
Q: What future recipe am I most eager to share?
A: Beer Braised Ribs. It’s just a delicious recipe. Good comfort food. A hearty Fall or Winter warmer. And most of all, easy to make (psst go buy a dutch oven).
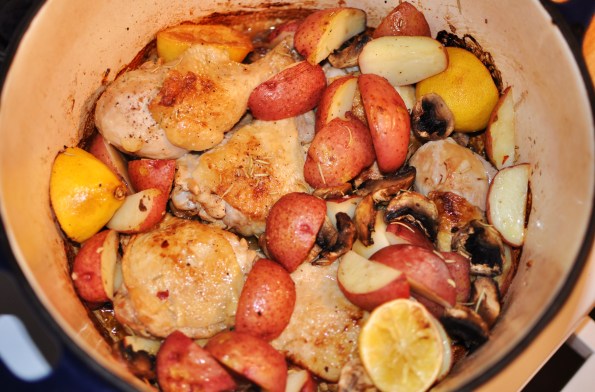
In the meantime, here is another recipe that makes use of my dutch oven. The original recipe which I adapted from Food Network, says to use a cast iron skillet and that will certainly work, but I don’t have one large enough to accommodate everything in this recipe so I improvised. I also used dried rosemary instead of fresh and thighs/legs instead of bone-in breasts. I simply think dark meat stands up better to the high heat. Enjoy!
Ingredients:
|
Basil-Garlic Rubbed Grilled Pork Chops
Recently I came across a recipe for grilled pork chops that I couldn’t wait to try. The picture of them looked fantastic and with the simple, fresh ingredients, it sounded like a winning combination.
I made a special trip to the store and dashed to the butcher counter. There I would have the butcher hand pick a few of the best looking, thick, bone-in chops I’d ever buy. I thought he would be annoyed when he would pick one, and I would kindly tell him “sorry, but could I have the one next to it.” Some people don’t do this and settle for pre-packaged shrink wrapped meat, but I say if I’m paying for it, I should get what I want. You should too.
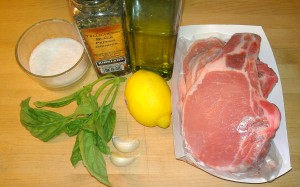
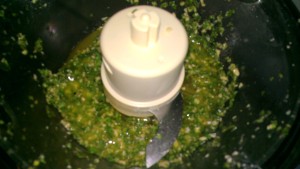
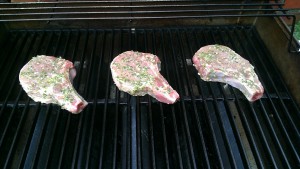
Once home, I assembled the ingredients (minus the pork) and gave them a quick death via the food processor to make a nice green paste. With my silicon pastry brush in hand I was happier than Bob Ross (rest in peace) as I painted my pork chops with the phenomenal smelling mix.
After an hour or so in the fridge, all that was left to do was fire up the grill. I stepped outside, lit the grill and impatiently waited for it to pre-heat. I needed some serious heat to acheive the kind of sear I wanted on these beauties.
With the heat from the grill at nearly 500 degrees, I gently placed the chops atop the grates. The sound of the meat sizzling as it hit the heat was music to my ears.
Then, out of nowhere the wind picked up and the sky turned to black. The heavens were about to unleash grilling hell upon me.
With the chops sizzling away, there was no turning back. I simply had no choice other than to finish what I started.
But it wasn’t about me. I could care less how wet I got. It was about those glorious hand picked chops. Would I be able to achieve the success I was looking for while darting in and out of the rain (for the record, an umbrella would not have helped here)? I needed to cook for a few minutes, rotate, flip, cook, rotate. Each time I would need to lift the lid, exposing the meat to buckets upon buckets of H2O. Could I pull it off? Would these be the pork chops I had hoped they would be when I first saw the recipe or would they land on my plate as mediocre hunks of the other white meat?
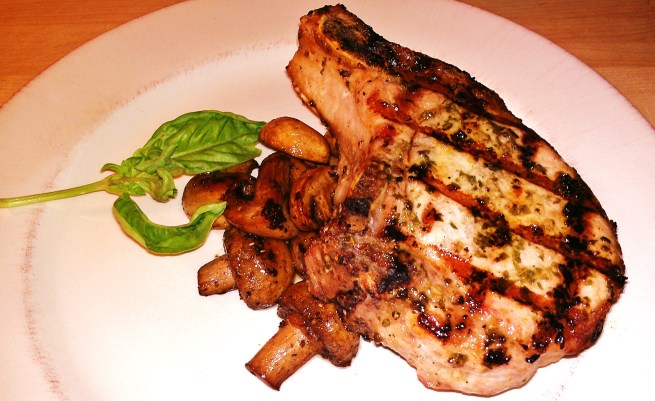
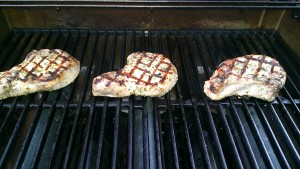
With the chops fully cooked (plus 5 minutes of rest and relaxation) it was time to transfer them to the plate for the tasting. Without hesitation I sliced the first bite and stabbed my creation with the steel tines. Fork to meat..fork to mouth. VICTORY!
OK, so after writing this I realized that I really, REALLY, over-dramatized the situation. Yes it rained and yes it sucked and that was my point. I just hate to grill in the rain. But for these chops, which I think were the best chops I’ve ever tasted, I’d do it all over again.
Ingredients:
- 3 or 4 thick cut bone-in pork chips
- 2 garlic cloves
- 1/2 cup fresh basil leaves
- 2 tablespoons of lemon juice
- 2 tablespoons of extra-virgin olive oil
- 1 teaspoon of kosher salt (or course salt)
- 1/2 teaspoon of fresh ground pepper
While the food processor is running, add the garlic to mince. Stop and add the basil and pulse to chop. Stop. Add lemon juice, olive oil, salt, and pepper and process to make a thin wet paste.
Spread mixture on both side of pork and let stand at least 15 minutes (up to 2 hours in the fridge – which is what I did).
Preheat grill to high.
When grill is hot, place the chops on the grates and grill 4 minutes. Rotate the chops one-quarter and grill 2 additional minutes.
Flip then grill for 3 minutes. Rotate one-quarter and grill an additional 2 minutes.
Remove from grill and let rest 5 minutes (if you can).
ENJOY!

